
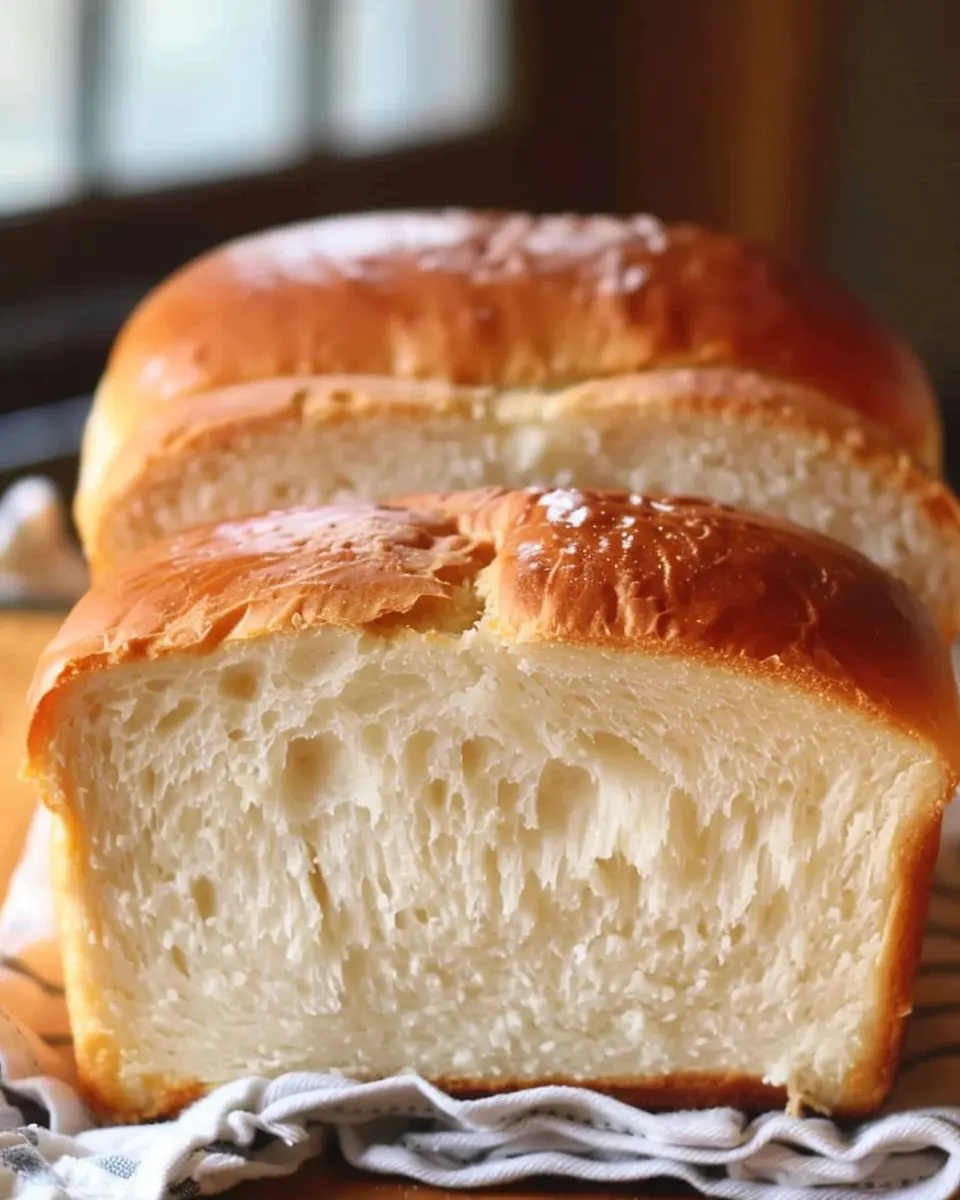
Introduction to No-Fail Amish White Bread
If you’ve ever walked into a kitchen where bread is baking, you know the magic that comes with fresh, warm loaves bubbling with aroma. Homemade bread isn’t just a treat; it’s a game changer in your culinary adventures. It transforms meals, elevates snacks, and has a way of making every moment feel just a bit more special.
When you bake your own bread, like our delightful No-Fail Amish White Bread, you gain much more than just a delicious end product. You’re embracing a wholesome lifestyle that encourages you to connect with your food, control the ingredients, and save some money too! According to a 2018 report from Statista, the average price of bread in the U.S. was over $2.50 per loaf, whereas making it at home can cost just a fraction of that.
The Joy of Baking
Imagine pulling a perfectly baked loaf from the oven, slicing into it, and witnessing the fluffy, tender crumb inside. There’s a certain fulfillment that comes from kneading dough, waiting for it to rise, and knowing you’re creating something from scratch. Plus, baking can be incredibly therapeutic! Many find it a great way to reduce stress and unwind after a long day.
Why Choose No-Fail Amish White Bread?
You might be thinking, “I’m not a baker!” But that’s where the No-Fail Amish White Bread comes in. This recipe is designed for those who may be intimidated by the idea of baking. With simple ingredients and straightforward steps, you’ll produce a beautiful loaf that’s perfect for sandwiches, toast, or just enjoying with a little butter.
The beauty of this bread lies in its reliability. Even if you’re a novice, this recipe sets you up for success. It’s created to yield extraordinary results every time. Plus, it can be customized! Imagine adding herbs, spices, or even cheese for a twist.
So, if you’ve ever wanted to take the plunge into homemade bread but felt overwhelmed, now’s your chance. With No-Fail Amish White Bread, you can embrace the joy of baking and enjoy the fabulous outcomes. Stay tuned for the full recipe and even more tips on perfecting your bread-making skills!

Ingredients for No-Fail Amish White Bread
Creating your very own No-Fail Amish White Bread at home is an incredibly rewarding experience. Let’s dive into the essential ingredients you’ll need for that perfect loaf!
Essential Ingredients
To craft this delightful bread, gather the following staples:
- All-Purpose Flour: The backbone of your bread; it provides structure and texture.
- Water: Warm water is crucial for activating the yeast—aim for around 110°F for optimal results.
- Sugar: Just a little sweetness to nourish the yeast during the fermentation process.
- Yeast: Opt for active dry yeast to get that lovely rise.
- Salt: Enhances flavor and keeps your bread from being bland.
- Vegetable Oil: This adds richness and moisture, making for a soft crumb.
These ingredients combine to create a simple yet satisfying loaf that’s perfect for sandwiches or toast.
Optional Ingredients for Enhanced Flavor
Want to take your No-Fail Amish White Bread up a notch? Consider these optional ingredients:
- Milk: For a richer flavor, substitute some water with milk.
- Honey: Add a touch of sweetness and a unique flavor profile.
- Herbs or Spices: Consider adding dried herbs like rosemary or garlic powder for an aromatic twist.
With these easy swaps, you can personalize your bread and impress your friends and family! For more insights on bread-making, check out King Arthur Baking. Happy baking!
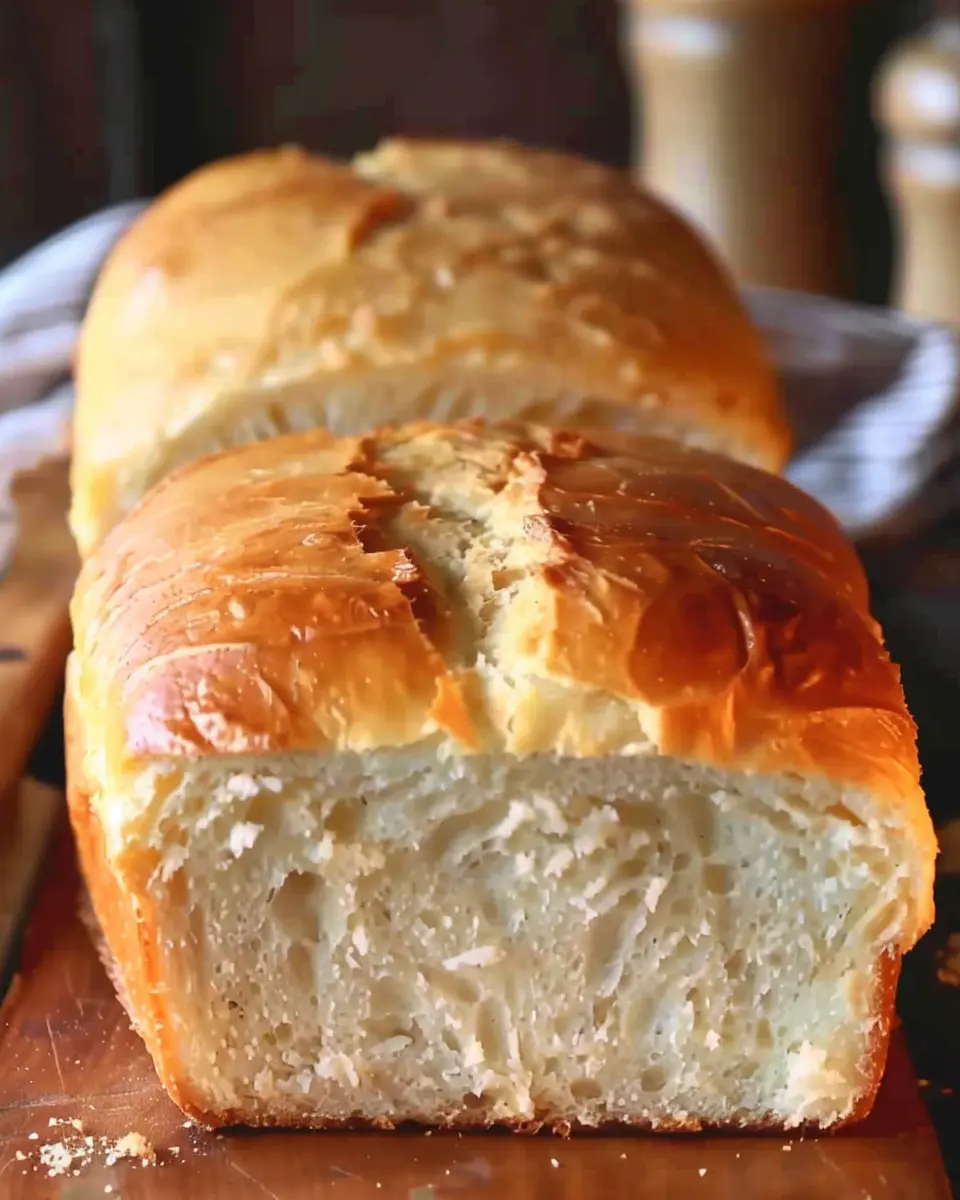
Preparing No-Fail Amish White Bread
Making No-Fail Amish White Bread is a delightful experience, especially when you see the beautiful loaves rising in your kitchen. This straightforward recipe is perfect for beginners and seasoned bakers alike. Let’s dive into the step-by-step process of creating this masterpiece while enjoying some friendly tips along the way.
Gather Your Ingredients and Tools
Before you start baking, ensure you have all your ingredients and tools at the ready. This not only streamlines the process but also sparks joy in your baking journey!
Ingredients:
- 4 cups all-purpose flour
- 1 packet (2¼ teaspoons) active dry yeast
- 1¾ cups warm water (about 110°F)
- ½ cup sugar
- ¼ cup vegetable oil
- 2 teaspoons salt
Tools:
- Mixing bowls
- Measuring cups and spoons
- Wooden spoon
- Baking sheets or loaf pans
- Clean kitchen towel or plastic wrap
If you’re looking for helpful baking tips or want to explore unique variations of bread recipes, you can check out resources like King Arthur Baking or the Joy of Baking.
Activate the Yeast
Start by activating your yeast. This step ensures that it’s alive and ready to work its magic in your dough.
- In a small bowl, mix the warm water and sugar.
- Sprinkle the yeast over the water and let it sit for about 5-10 minutes until it becomes foamy.
A successful yeast activation means your bread will rise beautifully, creating that perfect texture.
Mix the Dough
Once your yeast is bubbling with excitement, you’re ready to combine the ingredients:
- In a large mixing bowl, combine the flour and salt.
- Make a well in the center and add the yeast mixture along with the vegetable oil.
- Mix with a wooden spoon until a shaggy dough forms.
Don’t worry if it looks rough at this stage; that’s just how it’s supposed to look!
Knead the Dough
Time to give your dough some love! Kneading is essential for developing gluten, which gives your bread its structure.
- Transfer the dough onto a floured surface.
- Knead for about 8-10 minutes, until it becomes smooth and elastic.
- If it’s too sticky, sprinkle just a little more flour.
If kneading feels daunting, consider investing in a stand mixer with a dough hook—perhaps one day, I’ll get one too!
First Rise
It’s time for the dough to grow!
- Place the kneaded dough in a lightly greased bowl, cover with a clean kitchen towel or plastic wrap, and let it rise in a warm place.
- Leave it for about 1-2 hours, or until it has doubled in size.
This waiting period can be a great time to prep your favorite fillings for sandwiches or perhaps sip on a warm cup of tea while thinking about what you’ll do with your No-Fail Amish White Bread.
Shape the Loaves
Once the dough has risen beautifully, it’s time to shape those loaves.
- Punch down the dough to release the air and place it on a floured surface.
- Divide the dough into two equal pieces and shape each piece into a loaf.
Second Rise
This is the final stretch before baking!
- Place the shaped loaves into greased loaf pans.
- Cover them again and let them rise for about 30-45 minutes until they’ve puffed up.
Baking the Bread
It’s almost time for that delicious aroma to fill your kitchen!
- Preheat your oven to 350°F (175°C).
- Bake the loaves for 30-35 minutes, or until they sound hollow when tapped on the bottom.
Your No-Fail Amish White Bread is now ready to cool. Place it on a wire rack and resist the urge to slice it immediately—let it cool to retain its structure.
Enjoy your baking, and remember, bread-making is as much about the journey as it is about the destination. Happy baking!
Variations on No-Fail Amish White Bread
When you think of No-Fail Amish White Bread, envision a loaf as versatile as it is comforting. It’s a foundation for a variety of delightful flavor profiles, allowing you to create a bread that caters to your cravings. Let’s explore a few fun variations!
Whole Wheat Amish Bread
Want to amp up the nutrition? Trying a Whole Wheat Amish Bread is an excellent choice. Simply replace half the white flour with whole wheat flour for added fiber and a richer flavor. You can still follow your favorite recipe for No-Fail Amish White Bread—just be sure to adjust the liquid slightly, as whole wheat can absorb more moisture. Pair this bread with a delicious spread of almond butter for a health-conscious breakfast or snack.
Herb-Infused Amish Bread
Bring a touch of gourmet to your kitchen with Herb-Infused Amish Bread. Adding fresh or dried herbs, such as rosemary, thyme, or even oregano, can elevate your loaf to a whole new level. Incorporate around 2 tablespoons of your chosen herbs into the dough before the first rise. Picture serving thick slices slathered with garlic butter or creating delightful sandwiches with Turkey Bacon and ripe tomatoes—heaven on a plate!
Cinnamon Swirl Amish Bread
If you have a sweet tooth, the Cinnamon Swirl Amish Bread will be your favorite! Create a brown sugar-cinnamon mixture and layer it into the dough before rolling it. This last-minute addition transforms your basic loaf into a delightful breakfast treat. Don’t forget to drizzle some icing on top for extra decadence!
No matter which variation you choose, these easy upgrades will make your No-Fail Amish White Bread a cherished staple. For even more inspiration, check out this article on homemade bread variations or dive into exploring the world of baking enzymes and their benefits here. Happy baking!
Baking Notes for No-Fail Amish White Bread
Tips for Rising Dough
When it comes to making No-Fail Amish White Bread, the rising process is key. Here are some friendly tips to ensure your dough rises beautifully every time:
- Warm Environment: Dough loves warmth. Place your bowl in a warm, draft-free spot. You might even try turning on your oven for a minute, then turning it off and placing the dough inside.
- Cover It Up: Use a clean kitchen towel or plastic wrap to cover your dough. This helps retain moisture, promoting a fluffy outcome.
- Patience Is Virtue: Let your dough rise until it doubles in size—typically about 1 to 2 hours. It’s worth the wait!
Storing Leftover Bread
Who can resist fresh bread? If you do have any leftover No-Fail Amish White Bread, here’s how to store it for optimal freshness:
- Room Temperature: Store the bread in a bread box or a sealed bag at room temperature for up to three days.
- Freezing: For longer storage, slice the bread and freeze it in an airtight container. It can last up to three months without losing flavor!
For more insights on baking, you might enjoy King Arthur Baking’s tutorials or Food Network’s bread basics.
Serving Suggestions for No-Fail Amish White Bread
Perfect Pairings for Sandwiches
When it comes to No-Fail Amish White Bread, the world is your oyster! This beautifully soft bread is ideal for creating scrumptious sandwiches that satisfy any palate. Try layering in sliced turkey bacon and crisp lettuce for a classic take. For a heartier option, combine chicken ham with creamy avocado and a hint of mustard—it’s a quick lunch that packs flavor. Add fresh slices of tomato and onions for an extra crunch and nutrition.
Looking for a vegetarian twist? Consider hummus smeared on this bread, topped with roasted veggies for a delightful meat-free option. For more ideas on sandwich combinations, check out this article from The Kitchn.
Delightful Toast Toppings
Don’t overlook the joy of toasted slices of your No-Fail Amish White Bread! A simple spread of butter can elevate the flavor, but why stop there? Try topping your toast with:
- Avocado sprinkled with salt and pepper
- Peanut butter paired with sliced bananas
- Cream cheese with fresh herbs or smoked salmon
These toppings not only provide great taste but also add a nutritious punch to your breakfast or snacks. Looking for further inspiration? See this great list from Epicurious for endless toast possibilities. Enjoy the versatility of your homemade bread!
Tips for Making Perfect No-Fail Amish White Bread
Common Mistakes to Avoid
When making No-Fail Amish White Bread, it’s easy to overlook a few simple but crucial steps:
-
Over-measuring flour: Most people don’t realize that too much flour can lead to a dense loaf. Always scoop your flour lightly and level it off with a knife. Check out this flour measuring guide for expert techniques.
-
Skipping the kneading: Kneading develops gluten, giving your bread structure. Resist the urge to rush this step. Aim for about 8-10 minutes of kneading for the best results.
-
Neglecting the proofing time: Patience is key! Allow the dough to rise until it has doubled in size; this usually takes about 1 to 1.5 hours. Warm, draft-free environments are ideal for proofing.
Expert Advice for Beginners
Don’t let the thought of baking bread intimidate you. Here are some friendly tips to ensure your No-Fail Amish White Bread turns out perfectly every time:
-
Use fresh ingredients: Make sure your yeast is active. You can always test it by dissolving it in warm water with some sugar. If it’s bubbly after about 10 minutes, you’re good to go!
-
Room temperature matters: Ingredients like eggs and milk should be at room temperature before mixing. This helps with even baking.
-
Experiment with flavors: Once you’re comfortable with the basic recipe, feel free to add herbs or spices for a twist.
Finding joy in baking can be transformative. Why not start your weekend with the sweet aroma of fresh bread? Remember, practice makes perfect, so keep trying until you find your unique rhythm!
Time Breakdown for No-Fail Amish White Bread
When preparing to make No-Fail Amish White Bread, it’s essential to grasp the time you’ll invest. Let’s break down the process into manageable segments so you can plan accordingly.
Preparation Time
Getting started is super quick! You only need about 15-20 minutes to gather your ingredients and mix everything together. The beauty of this recipe lies in its simplicity—no advanced techniques required.
Rising Time
Once you’ve mixed the dough, it’s time for it to rise. This step is crucial for achieving that perfect fluffy texture. Allow the dough to rise for approximately 1 hour, or until it doubles in size. This is a great time to clean up your kitchen or take a short break.
Baking Time
Baking is where the magic happens! Your No-Fail Amish White Bread will need around 30-35 minutes in the oven. Keep an eye on it; you want that golden brown color to signal it’s done.
Total Time
In total, you’re looking at about 2 hours to complete this delightful bread-making process, including all rising and baking time. So, why not indulge in a slice of freshly baked bread? Pair it with some turkey bacon or chicken ham for a mouthwatering meal!
For more tips on bread-making, check out King Arthur Baking for expert advice. Just remember, the more you practice, the better you’ll become! Happy baking!
Nutritional Facts for No-Fail Amish White Bread
Understanding the nutritional profile of your favorite comfort food is key to maintaining a balanced diet. Let’s break down what you can expect from a slice of No-Fail Amish White Bread.
Calories per Slice
Each slice of this delightful bread packs around 100-120 calories, making it an easy addition to your meals without overwhelming your daily intake.
Carbohydrate Content
This bread is primarily composed of carbohydrates, with about 20-25 grams per slice. The combination of simple and complex carbs offers you the energy boost you need to power through your day.
Protein and Fiber Information
While not a heavy source of protein, you can expect about 3 grams of protein per slice. With a modest 1 gram of dietary fiber, it’s helpful to pair it with nutrient-rich toppings like avocado, turkey bacon, or chicken ham to enhance its nutritional value. Looking for more nutritional insights? Check out resources like the USDA FoodData Central for detailed breakdowns.
Pairing this bread with healthy spreads can really elevate your meal, making it not just satisfying but also nourishing. Enjoy your baking adventure!
FAQs about No-Fail Amish White Bread
Can I Use Whole Wheat Flour?
If you’re wondering whether you can switch things up with whole wheat flour, the answer is yes, but keep in mind that this will adjust the texture and flavor of your No-Fail Amish White Bread. Whole wheat flour tends to absorb more liquid, so you may need to increase the amount of water in your recipe. A good rule of thumb is to start with a 50/50 mix of whole wheat and all-purpose flour to ensure your bread remains soft and delicious.
How Do I Know When the Bread is Done?
Knowing when your No-Fail Amish White Bread is perfectly baked can be a bit tricky for beginners. Here are some tips to help:
- Color: Look for a golden-brown crust.
- Temperature: Use an instant-read thermometer. Aim for an internal temp of about 190°F to 200°F.
- Tap Test: Gently tap the bottom of the loaf; if it sounds hollow, it’s ready!
These methods will help you achieve that perfect loaf every time.
Can I Freeze the Bread?
Absolutely, freezing your No-Fail Amish White Bread is a great way to keep it fresh for longer! Just make sure to wrap it tightly in plastic wrap or aluminum foil, followed by placing it in a resealable freezer bag. For best quality, try to consume it within three months. When you’re ready to enjoy it, simply let it thaw at room temperature or pop slices straight into the toaster.
Let your baking adventures flourish, and remember, practice makes perfect! For additional insights and recipes, check out resources like the King Arthur Baking Company for expert advice. Happy baking!
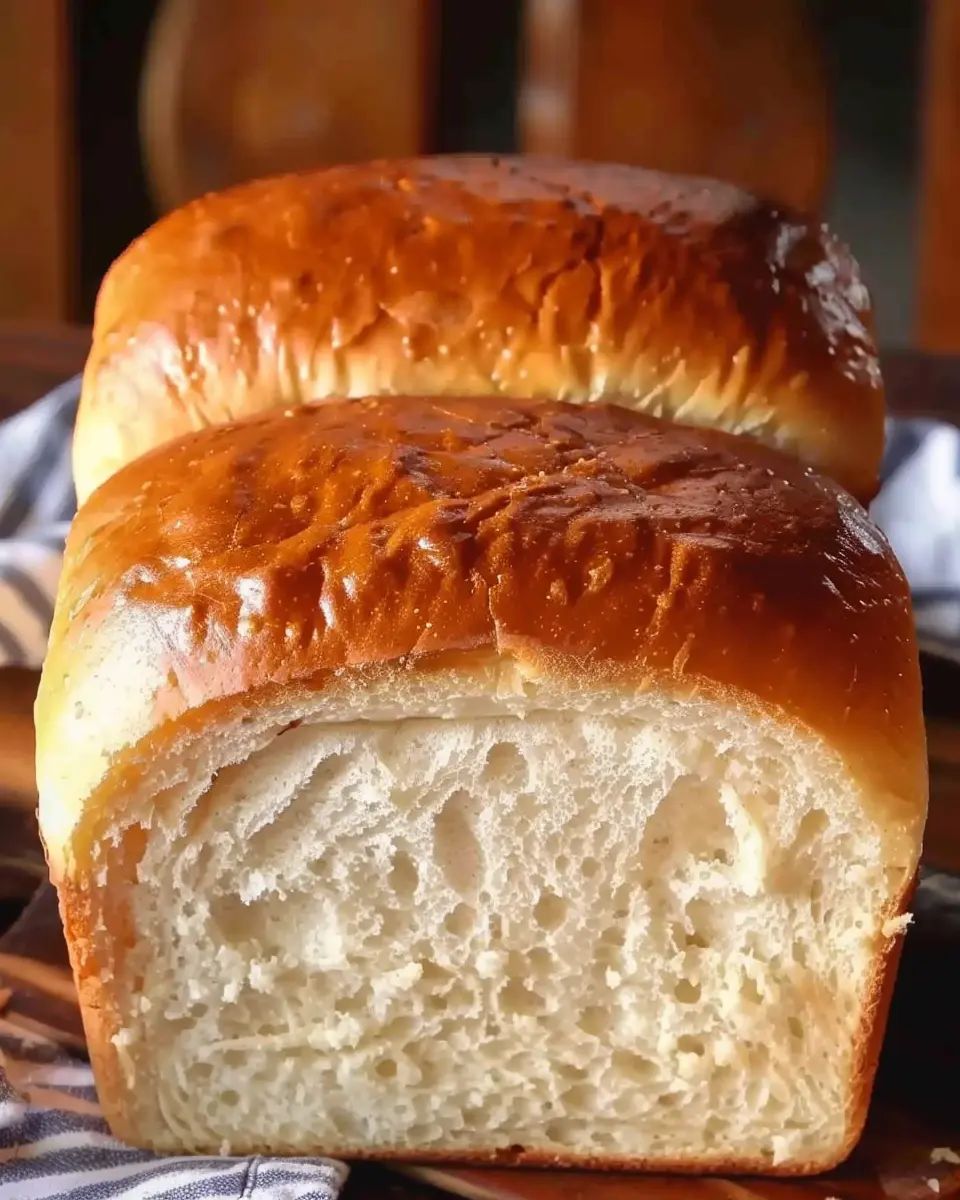
Conclusion on No-Fail Amish White Bread
Embracing the Joy of Homemade Bread
Baking No-Fail Amish White Bread is more than just cooking; it’s an experience that fills your kitchen with warmth and invites loved ones to gather around. The aroma of fresh bread rising in the oven is truly irresistible. This recipe’s simplicity means that even novice bakers can enjoy the process and triumph over their fears of failure.
Sharing this bread with family or friends creates unforgettable moments, making it a wonderful addition to any meal. Ready to take on the baking journey? Dive into your own bread-making adventure, and discover why homemade bread is a beloved tradition. For a deeper exploration of bread-making tips, check out resources like King Arthur Baking for expert advice!
PrintNo-Fail Amish White Bread: The Best Recipe for Home Bakers

A simple and reliable recipe for making delicious Amish white bread at home.
- Prep Time: 15 minutes
- Cook Time: 35 minutes
- Total Time: 1 hour 50 minutes
- Yield: 2 loaves
- Category: Bread
- Method: Baking
- Cuisine: American
- Diet: Vegetarian
Ingredients
- 4 cups all-purpose flour
- 2 tablespoons sugar
- 2 teaspoons salt
- 2 tablespoons active dry yeast
- 1 ½ cups warm water
- 2 tablespoons vegetable oil
Instructions
- In a large bowl, combine warm water, sugar, and yeast. Let it sit for 5 minutes until frothy.
- Add vegetable oil and salt to the mixture, then gradually stir in the flour.
- Knead the dough on a floured surface until smooth and elastic, about 10 minutes.
- Place the dough in a greased bowl, cover, and let rise until doubled in size, about 1 hour.
- Punch down the dough and shape it into loaves.
- Place the loaves in greased pans and let rise again until doubled, about 30 minutes.
- Bake in a preheated oven at 350°F (175°C) for 30-35 minutes until golden brown.
Notes
- Ensure your water is not too hot to avoid killing the yeast.
- You can add herbs or seeds for variation.
Nutrition
- Serving Size: 1 slice
- Calories: 120
- Sugar: 1g
- Sodium: 210mg
- Fat: 3g
- Saturated Fat: 0g
- Unsaturated Fat: 2g
- Trans Fat: 0g
- Carbohydrates: 22g
- Fiber: 1g
- Protein: 4g
- Cholesterol: 0mg


")