

Beginner’s Guide to Artisan Baking
What is Artisan Baking and why should you try it?
Artisan baking is more than just a cooking method; it’s a beautiful intersection of art and science. This approach emphasizes quality ingredients, traditional techniques, and a personal touch. When you think of artisan baked goods, envision crusty breads with a golden crust, delicate pastries, and cakes that sing with flavor — all created by passionate bakers who cherish the craft.
So, why should you dive into the world of artisan baking? Well, there are plenty of compelling reasons to give it a shot:
-
Craftsmanship: Crafting your bread or pastries allows you to take control of every ingredient that goes into it. Most store-bought options are filled with preservatives, while your creations can be pure and wholesome.
-
Flavor: Artisan baking relies on fermentation and high-quality ingredients, resulting in extraordinary flavors and textures. Take sourdough bread, for instance. That tangy flavor and chewy crust come from natural fermentation processes, which you can replicate at home!
-
Mindfulness: The process of baking can be therapeutic. Kneading dough can be a great way to relieve stress and take a break from the hustle of daily life. It’s a simple pleasure that invites you to slow down and enjoy the moment.
-
Connection: Sharing your creations with friends and family can foster deeper connections. Who doesn’t love biting into a piece of homemade bread or a fresh pastry made with love?
Getting Started with Artisan Baking
As a beginner, it may feel a bit daunting, but you’ll find that the results are worth it. Start with simple recipes, like classic artisan bread or savory pastries. Focus on mastering a few essential techniques, such as proper kneading, baking temperatures, and fermentation times. The more you practice, the more comfortable and confident you’ll become.
If you’re interested in learning more about the science behind baking, resources like The Bread Baker’s Apprentice by Peter Reinhart can be great companions on your journey. Additionally, check out some online baking communities or forums for inspiration and support.
Embrace the process of artisan baking — it really is a rewarding path filled with delicious possibilities!
Ingredients for Artisan Bread
Essential ingredients for the World’s Easiest Yeast Bread
When diving into the world of artisan bread, it’s vital to understand the basic ingredients that form the foundation of this delicious craft. In this Beginner’s Guide to Artisan Baking, we’ll focus on the essential elements you need to create a perfect loaf.
-
Flour: The star of the show! All-purpose flour works wonders, but try using bread flour for an extra boost of strength. This gives your loaf that chewy texture you crave.
-
Water: Hydration is key. Use lukewarm water to activate the yeast efficiently. A good rule of thumb is about 75% hydration for a crusty exterior.
-
Yeast: Instant or active dry yeast makes life easier. They simplify the fermentation process, allowing you to achieve that airy crumb without spending hours waiting.
-
Salt: Don’t skip this! Salt enhances flavor and strengthens gluten structure.
-
Optional Add-ins: Feel free to personalize your bread with herbs, seeds, or even a touch of garlic for that extra kick.
By understanding these core ingredients, you’re one step closer to baking your own stunning artisan bread! For more tips on yeast varieties and bread-making techniques, check out resources from expert bakers like King Arthur Baking.
Step-by-step Preparation for Artisan Bread
Baking artisan bread can seem daunting, especially for those diving into it for the first time. However, with the right approach, it can be a rewarding experience filled with delightful aromas and the satisfaction of homemade goodness. Below, we’ll walk you through a simple, step-by-step guide to ensure you master the art of artisan baking.
Gather your ingredients
Before diving into the mixing and kneading, it’s essential to have everything you need at hand. Here’s your shopping list for basic artisan bread:
- 4 cups of all-purpose flour: This will give your bread that hearty texture.
- 1 tablespoon of salt: Essential for flavor.
- 1 ½ teaspoons of instant yeast: Our magic ingredient for rise!
- 1 ½ cups of warm water: This should be around 110°F to activate the yeast.
Once you have your ingredients, make sure to measure them accurately. This is crucial in baking because the structure of your bread relies on the right ratios.
Mix the dry ingredients
In a large mixing bowl, combine your dry ingredients. Start with the flour, salt, and yeast. It’s vital to mix these well with a whisk to ensure even distribution. If you’re curious, a 2019 study found that even small variations in ingredient ratios can lead to significant differences in bread texture and flavor. So, when it comes to mixing, keep it consistent!
Combine the wet ingredients
Next, create a well in the center of your dry mix and add the warm water. Using a wooden spoon or your hands, gently combine the ingredients until it forms a shaggy dough. Don’t worry about achieving a perfectly smooth texture at this stage — a little mess is part of the charm of artisan baking!
Allow the dough to rise
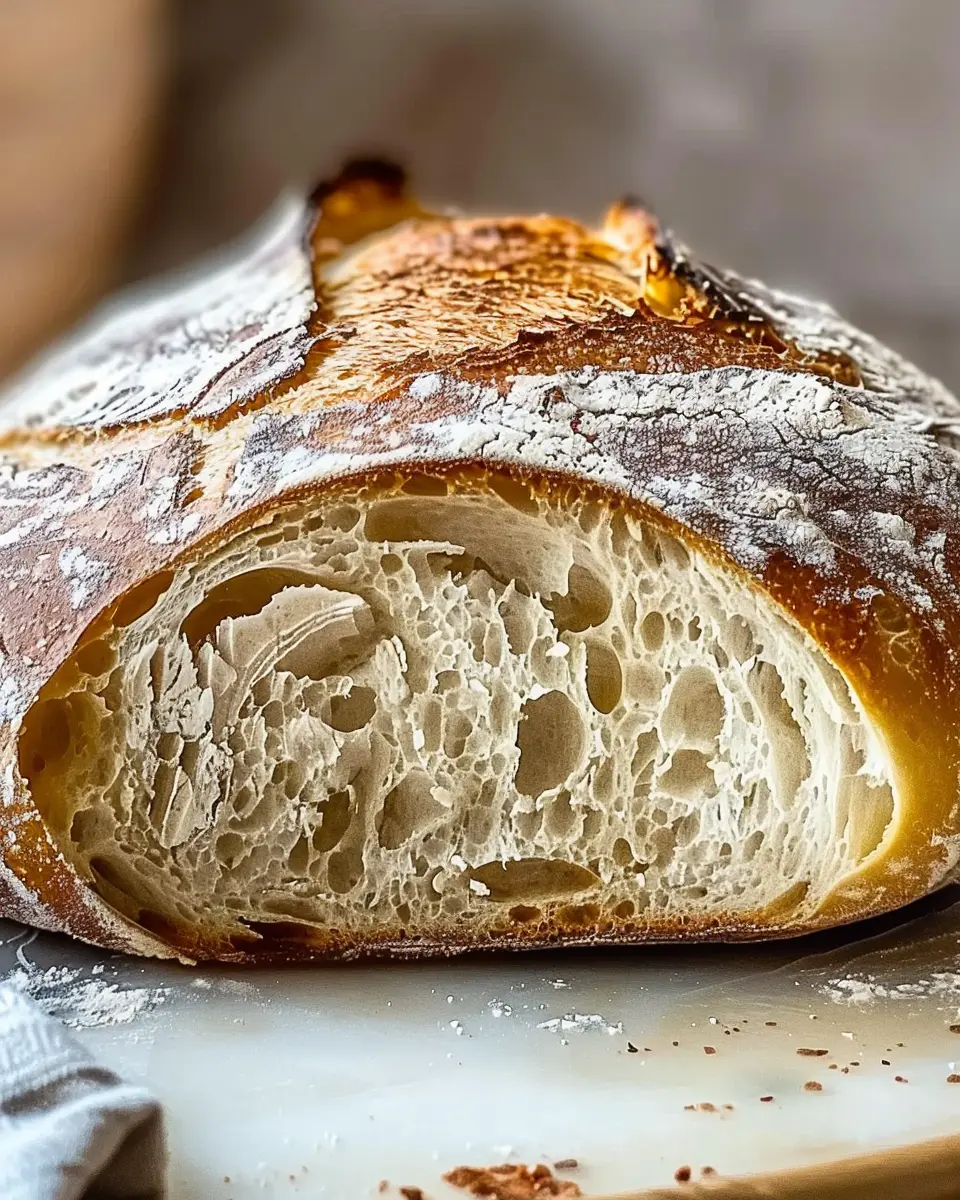
Now comes the waiting game, where the magic truly happens. Cover the bowl with a clean kitchen towel or plastic wrap and let it sit at room temperature for about 12-18 hours. The longer rise allows for the development of gluten and flavor. If you’re following the Beginner’s Guide to Artisan Baking, you’ll quickly learn that patience pays off in this step.
Shape the dough
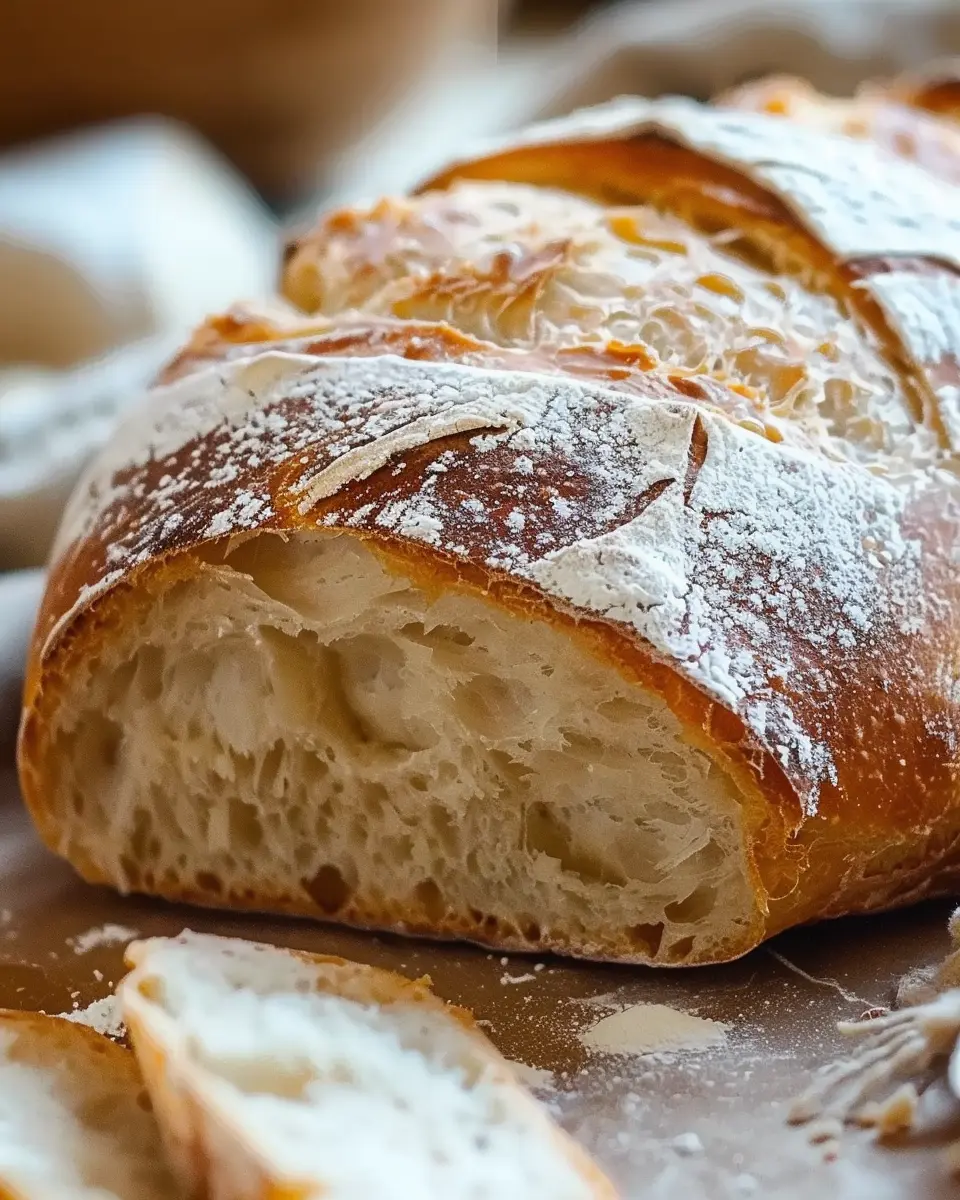
Once your dough has risen and you see bubbles on the surface, it’s time to shape it. Dust your work surface with flour, then gently turn the dough out. Fold the edges toward the center to form a round shape. This helps create surface tension, giving your bread that beautiful crust.
Prepare the Dutch oven
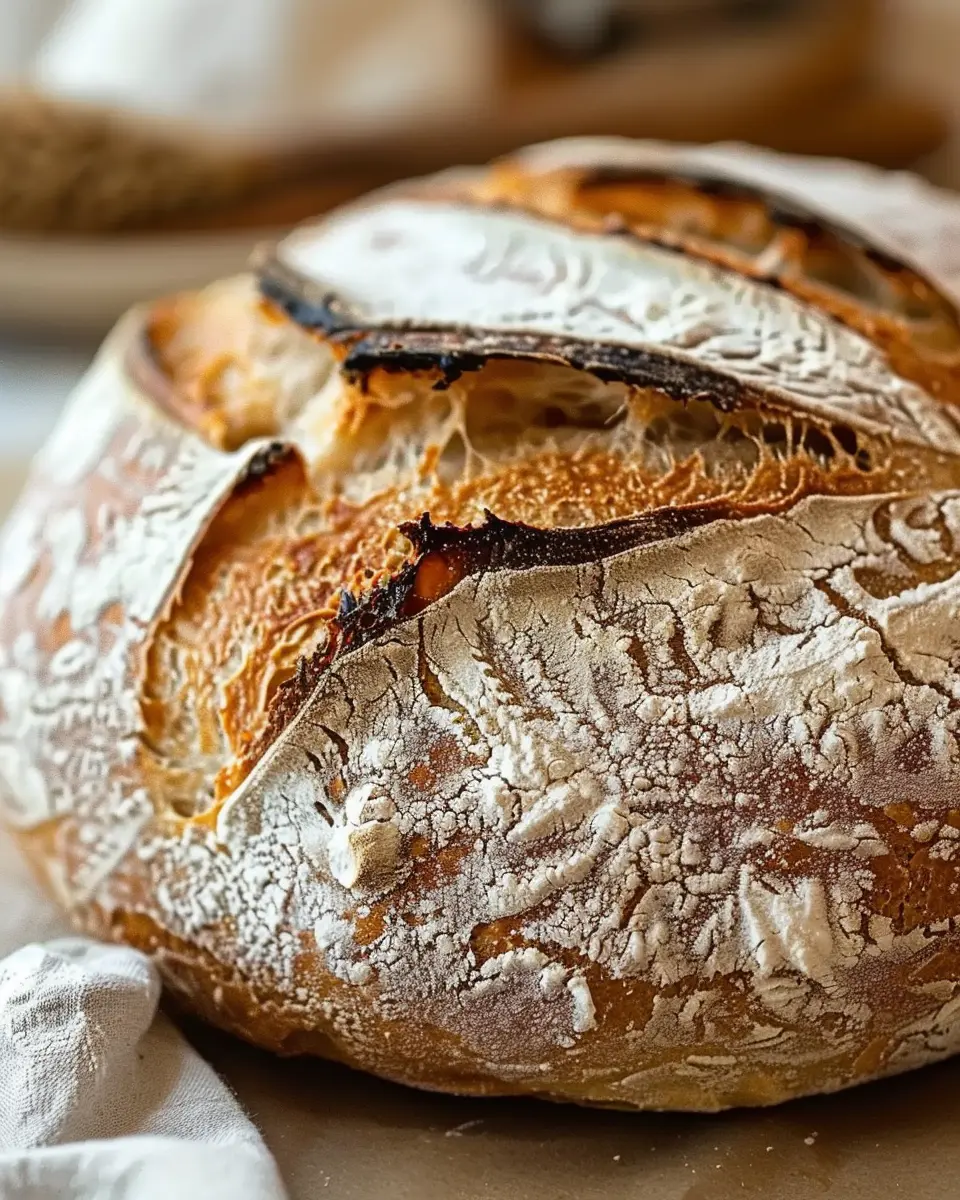
While you’re shaping your dough, preheat your oven to 450°F and place your Dutch oven inside to heat up as well. If you don’t have a Dutch oven, you can use a heavy baking sheet, but the enclosed environment of the pot will enhance the steam, producing a crusty exterior that is so beloved in artisan bread.
Bake your artisan bread
Once heated, carefully remove the Dutch oven (be cautious; it’s hot!). Place your shaped dough inside, cover it with the lid, and put it back in the oven. Bake it covered for about 30 minutes, then remove the lid and bake for an additional 15 minutes, allowing the crust to turn a golden brown. This step is crucial: the initial steaming creates that sought-after crust.
When your house fills with the aroma of freshly baked bread, you’ll know you’ve done it right! Allow the bread to cool on a wire rack before slicing. Trust me; the wait is totally worth it.
Following these simple steps will guide you on your journey to baking artisan bread. As you become more comfortable, you can start experimenting with flavors and ingredients, opening up a world of delicious possibilities. Baking, after all, is about creativity and comfort – so get in the kitchen, roll up your sleeves, and enjoy the process!
Variations on Artisan Bread
Artisan bread opens a world of creativity and flavor. As you embark on your Beginner’s Guide to Artisan Baking, you’ll find that the variations of this timeless loaf are as diverse as the bakers themselves. Here, we’ll explore some delightful twists you can try.
Whole Grain Artisan Bread
If you favor a nutty flavor and hearty texture, whole grain artisan bread is your go-to. By simply swapping out white flour for whole wheat or a mix of whole grains like spelt or rye, you get a loaf packed with nutrients and fiber. Not only does this elevate the taste, but it also increases its health benefits. Incorporating seeds such as flax or sunflower can add a delightful crunch and nutrient boost. Want to learn more about the health benefits of whole grains? Check out Whole Grains Council.
Herb-Infused Artisan Bread
Nothing beats the aroma of herb-infused artisan bread baking in your kitchen. Imagine the enticing scents of fresh rosemary, thyme, or basil wafting through the air. Simply mix finely chopped herbs into your dough, or sprinkle them on top before baking. Pairing it with a simple olive oil dipping sauce elevates your bread experience to gourmet status, perfect for gatherings or a cozy night in.
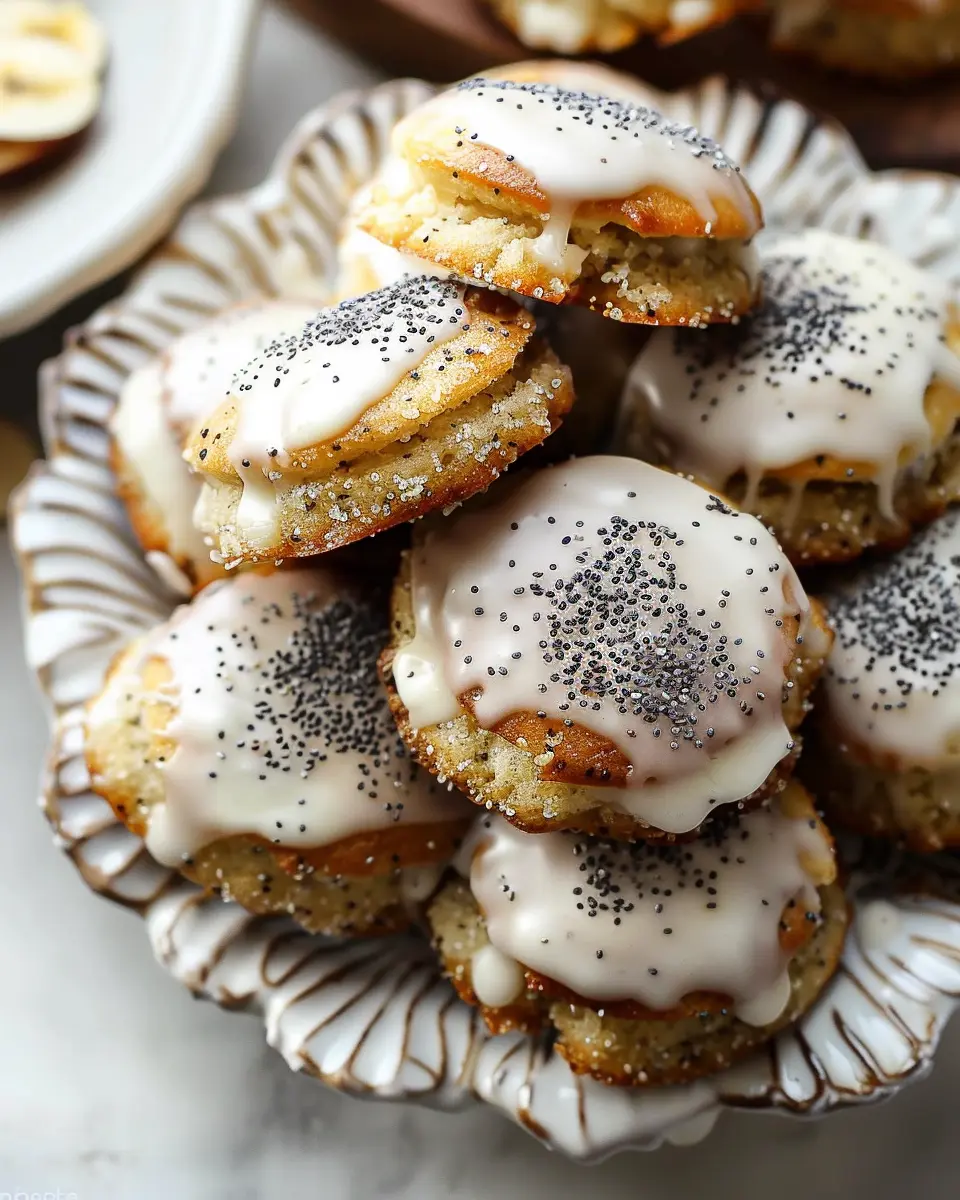
Sweet Artisan Bread
Looking to satisfy a sweet tooth? Sweet artisan bread might just be your new favorite. Adding ingredients like cinnamon, dried fruits (think raisins or cranberries), or even chocolate chips can transform a simple loaf into a delicious dessert. This variation is ideal for breakfast or an afternoon indulgence, especially when served warm with a pat of butter.
By experimenting with these variations, you’ll discover that the possibilities in artisan baking are truly endless!
Cooking Tips and Notes for Artisan Bread
Tips for Perfecting the Crust
Achieving that perfect crust can be a game changer for your bread-making journey. Start by preheating your oven with a baking stone or a cast iron skillet inside; this provides consistent heat. To get that delightful crunch, consider introducing steam during the first few minutes of baking. You can do this by placing a pan of water at the bottom of your oven or spritzing your dough with water right before baking.
Common Mistakes to Avoid
Even seasoned bakers make mistakes! One common pitfall when following this Beginner’s Guide to Artisan Baking is not giving your dough enough time to rise. Patience is key; allow your dough to double in size for optimal flavor and texture. Another mistake is skipping the shaping; proper shaping helps develop strength, ensuring your bread holds its shape.
Understanding Oven Temperatures
Oven temperatures play a crucial role in your bread baking. Most artisan breads bake best between 425°F and 475°F. Invest in an oven thermometer for accuracy, as many ovens can be off by as much as 25 degrees. This small tool can greatly impact your baking results and flavor profiles, ensuring you can create stunning artisanal loaves every time.
Serving Suggestions for Artisan Bread
Artisan bread isn’t just about the crust and crumb; it’s about how you enjoy it! Let’s explore some delightful serving suggestions that will elevate your bread experience.
Enjoying artisan bread with dips
Dive into a world of flavors by pairing your freshly baked bread with dips. Think hummus, tzatziki, or a robust olive oil mixed with balsamic vinegar. These simple yet delicious accompaniments can turn a slice of bread into a delightful appetizer. For a twist, try a spicy bean dip or a creamy avocado spread. Your taste buds will thank you!
Pairing bread with meals
Artisan bread can complement a variety of meals. Serve it alongside a hearty soup like butternut squash or a fresh salad to balance the textures. Consider a warm bowl of chili – hearty and comforting! Did you know that bread can soak up flavors beautifully? The right bread can enhance your meal experience, making each bite more satisfying.
Creative sandwich ideas
Elevate your lunch game by crafting unique sandwiches with artisan bread. Opt for toasted slices piled high with turkey bacon, spinach, and a zesty aioli for a delicious twist. Or try a grilled cheese with your favorite melted cheeses and roasted vegetables. The world of sandwiches is your oyster!
In this Beginner’s Guide to Artisan Baking, we not only teach you how to make bread but also how to enjoy it fully. Bread can be more than a side; it’s a versatile star on your dining table. Enjoy experimenting with these ideas, and don’t forget to share your creations with friends! For more serving suggestions, check out BBC Good Food and Serious Eats.
Time Breakdown for Artisan Bread
Preparation Time
Getting everything ready for your delicious artisan bread takes about 30 minutes. This includes mixing your ingredients, kneading the dough, and setting it aside. It’s a great time to embrace the sensory experience of baking, as you’ll feel the textures and scents come together.
Rising Time
One of the most exciting parts of baking is watching your dough rise! This typically takes around 1 to 2 hours. During this time, the yeast works its magic, and your future loaf starts to form. Feel free to check in on it occasionally; it’s a real transformation!
Baking Time
When it’s finally time to bake, you’ll need about 30-40 minutes. This is when your kitchen fills with the warm, inviting aroma of fresh bread. Keep an eye on your loaf; you’ll know it’s done when it’s a beautiful golden brown.
Total Time
In total, expect to spend about 2 to 3 hours on this culinary adventure, including all the preparation, rising, and baking time. While it might seem lengthy, most of it is hands-off, allowing you to savor the process. For a deeper dive into this topic, check out the Beginner’s Guide to Artisan Baking for tips on perfecting your skills!
Nutritional Facts for Artisan Bread
Serving Size
The typical serving size for artisan bread is one slice, which weighs about 28 grams. This allows for easy portion control whether you’re enjoying your bread alone or as part of a meal.
Calories
In one slice of artisan bread, you can expect approximately 70-80 calories. While artisanal options may vary slightly in their caloric content, this range makes it a thoughtful addition to your diet without being overly indulgent.
Carbohydrates and Protein
Artisan bread is mainly composed of carbohydrates, providing about 15-20 grams per slice. It also contains 2-3 grams of protein, making it a fantastic energy source for your day. To balance this out, consider pairing it with lean protein sources, like turkey bacon or chicken ham, for a well-rounded meal. For more on healthy eating, check out resources from the USDA.
As you explore the Beginner’s Guide to Artisan Baking, remember to savor the experience. Crafting your own bread not only nourishes your body but feeds your creativity!
FAQs about Artisan Bread
Baking artisan bread can seem daunting for beginners, but I’m here to answer your burning questions and make the process a little less intimidating. Let’s dive in!
Can I use all-purpose flour instead of bread flour?
Absolutely! While bread flour has a higher protein content, which helps create that lovely chewy texture we all love, all-purpose flour can do the job in a pinch. Your bread might be slightly softer, but it will still taste delicious. For more on the differences between these flours, check out this guide from King Arthur Baking.
How do I store leftover artisan bread?
To keep your artisan bread fresh, it’s best to store it in a paper bag at room temperature, which allows it to breathe and retain its crusty exterior. If you want to keep it longer, consider slicing it and freezing it in a sealed plastic bag. When you’re ready to enjoy it, just pop the slices in a toaster or let them thaw at room temperature. Trust me, you’ll want to savor every bite!
Can I make this recipe without instant yeast?
Yes, you can! If you prefer active dry yeast, just activate it in warm water with a bit of sugar before adding it to your dough. Alternatively, you could explore using a sourdough starter for a unique flavor profile. For a deeper dive into yeast options, check this sourdough guide.
That’s it for now! Keep these tips in mind as you embark on your beginner’s guide to artisan baking, and get ready to enjoy delicious bread made by your very own hands. Happy baking!
Conclusion on Artisan Baking
Embracing the Art of Homemade Bread
As we wrap up this Beginner’s Guide to Artisan Baking, remember that the heart of baking lies not just in technique, but in the joy of creating something with your own hands. The mesmerizing aroma of freshly baked bread will transform your kitchen into a cozy haven. Embrace those moments when the dough is sticky and the process feels challenging; they only add to the beauty of your journey.
Getting started with artisan baking opens a world of flavors and textures that store-bought options can’t match. Plus, when you share your homemade bread with family and friends, you’re gifting them a slice of your passion and creativity. So grab your apron, experiment, and enjoy every step of the way!
For further tips and inspiration, check out resources like King Arthur Baking or The Spruce Eats. Happy baking!
PrintBeginner’s Guide to Artisan Baking: Easy Tips for Delicious Bread
Learn the essentials of artisan baking with this comprehensive guide that provides easy tips for making delicious bread at home.
- Prep Time: 20 minutes
- Cook Time: 35 minutes
- Total Time: 1 hour 55 minutes
- Yield: 1 loaf
- Category: Baking
- Method: Baking
- Cuisine: American
- Diet: Vegetarian
Ingredients
- 4 cups all-purpose flour
- 1 tablespoon salt
- 2 teaspoons active dry yeast
- 1 ½ cups warm water
Instructions
- In a large bowl, mix flour, salt, and yeast.
- Gradually add warm water, mixing until a dough forms.
- Knead the dough on a floured surface for about 10 minutes.
- Place the dough in a greased bowl, cover it, and let it rise for 1 hour.
- Preheat your oven to 450°F (232°C).
- Shape the dough into a loaf and place it in a bread pan.
- Bake for 30-35 minutes until golden brown.
Notes
- Let the bread cool before slicing for better texture.
- Experiment with different flours for varied flavors.
Nutrition
- Serving Size: 1 slice
- Calories: 120
- Sugar: 0.5g
- Sodium: 500mg
- Fat: 1g
- Saturated Fat: 0g
- Unsaturated Fat: 1g
- Trans Fat: 0g
- Carbohydrates: 25g
- Fiber: 1g
- Protein: 4g
- Cholesterol: 0mg


")