
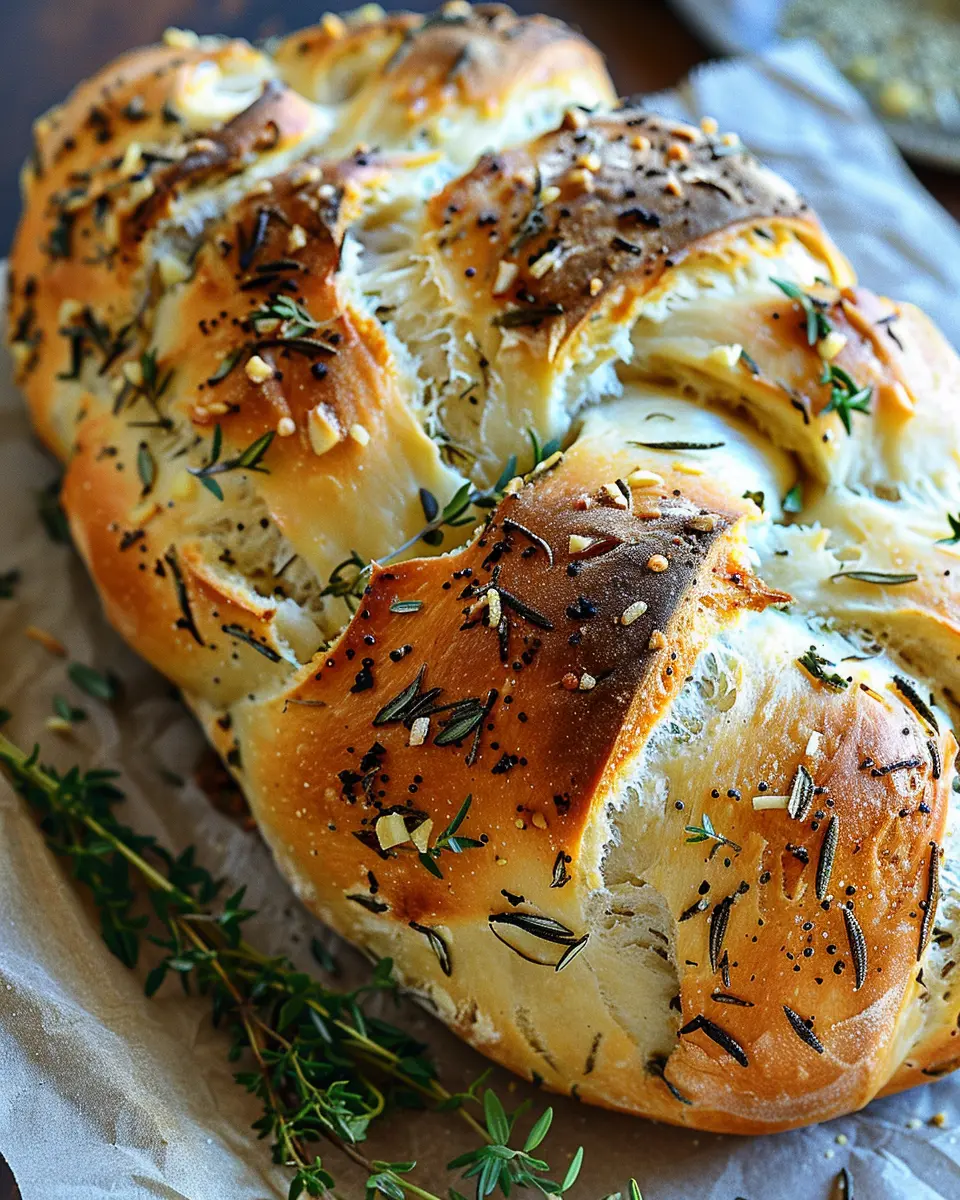
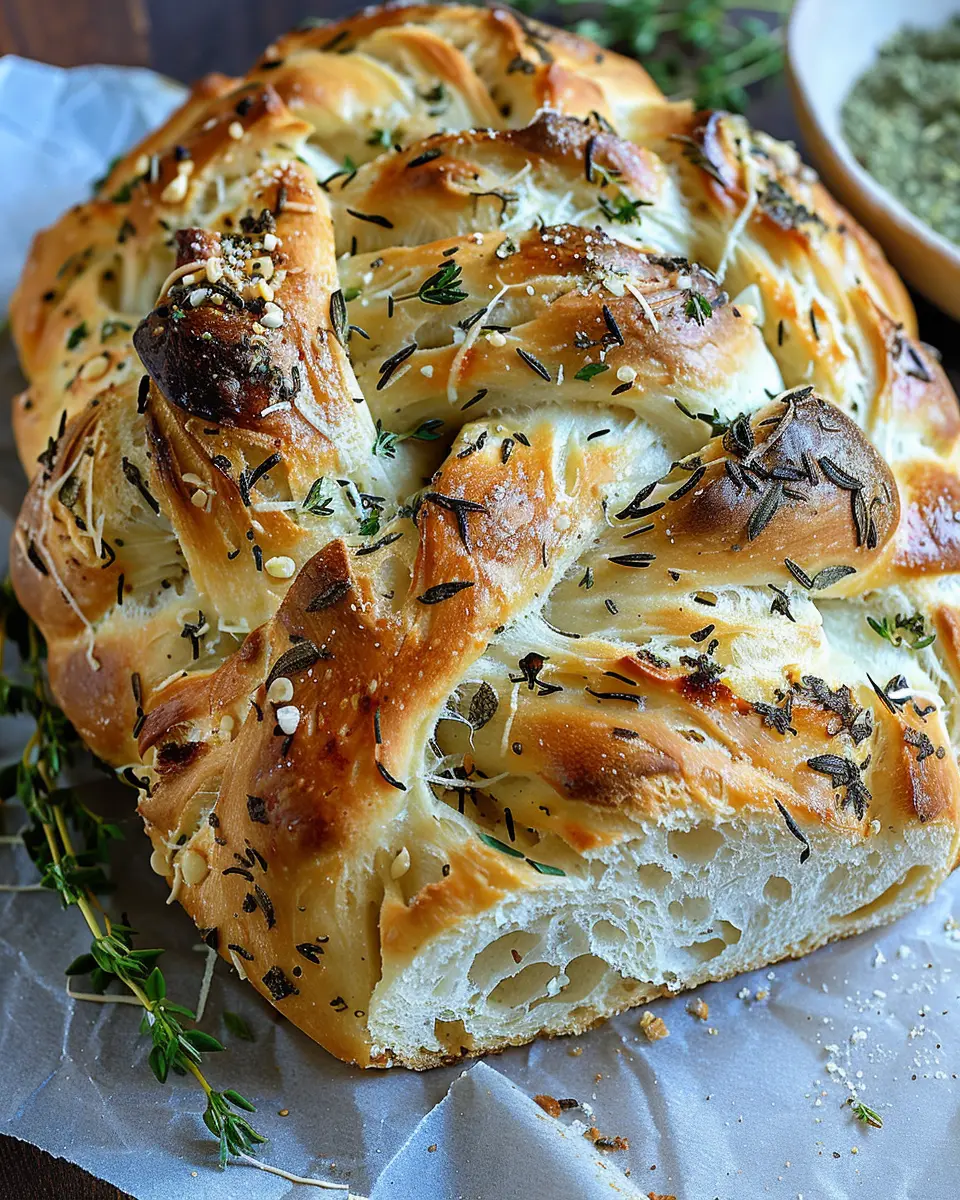
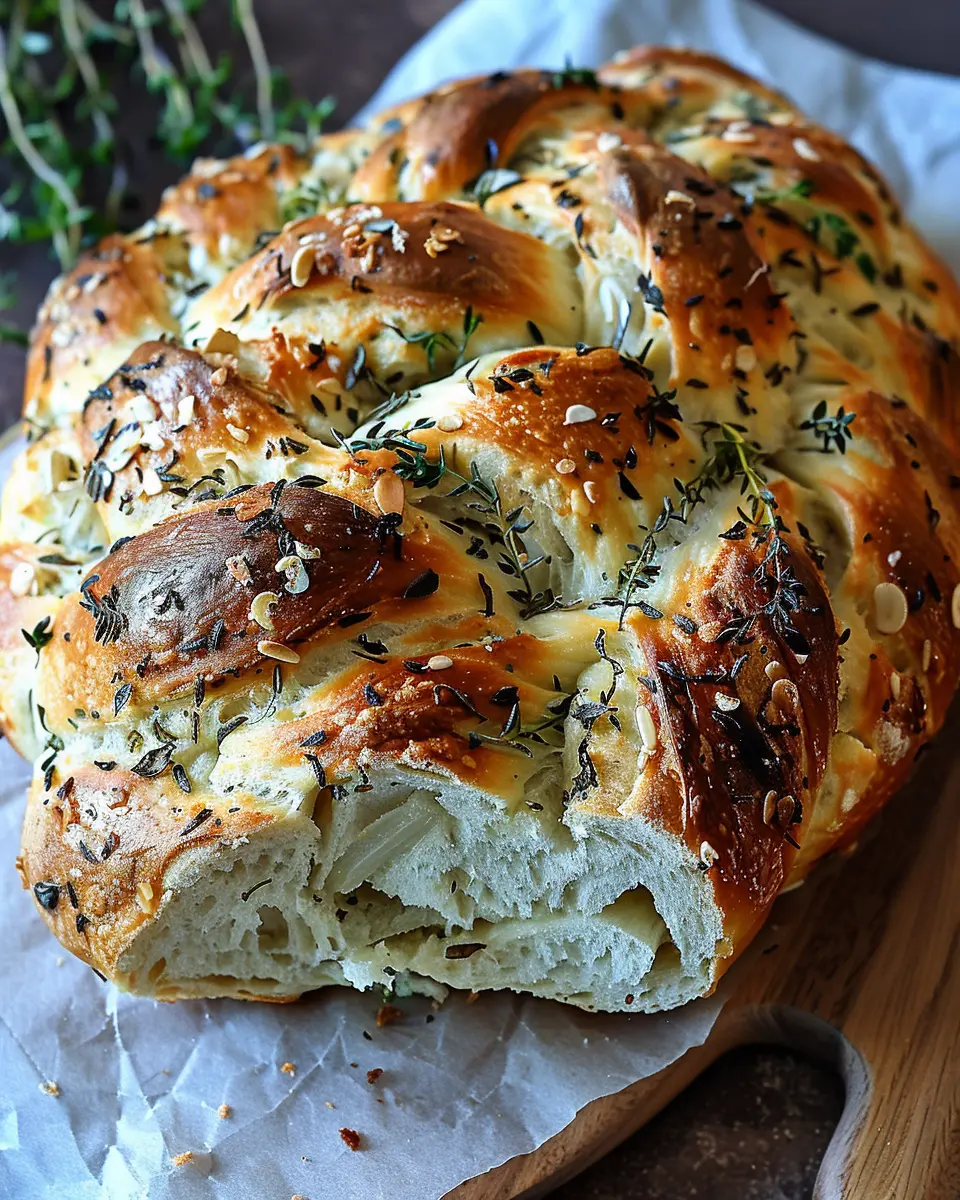
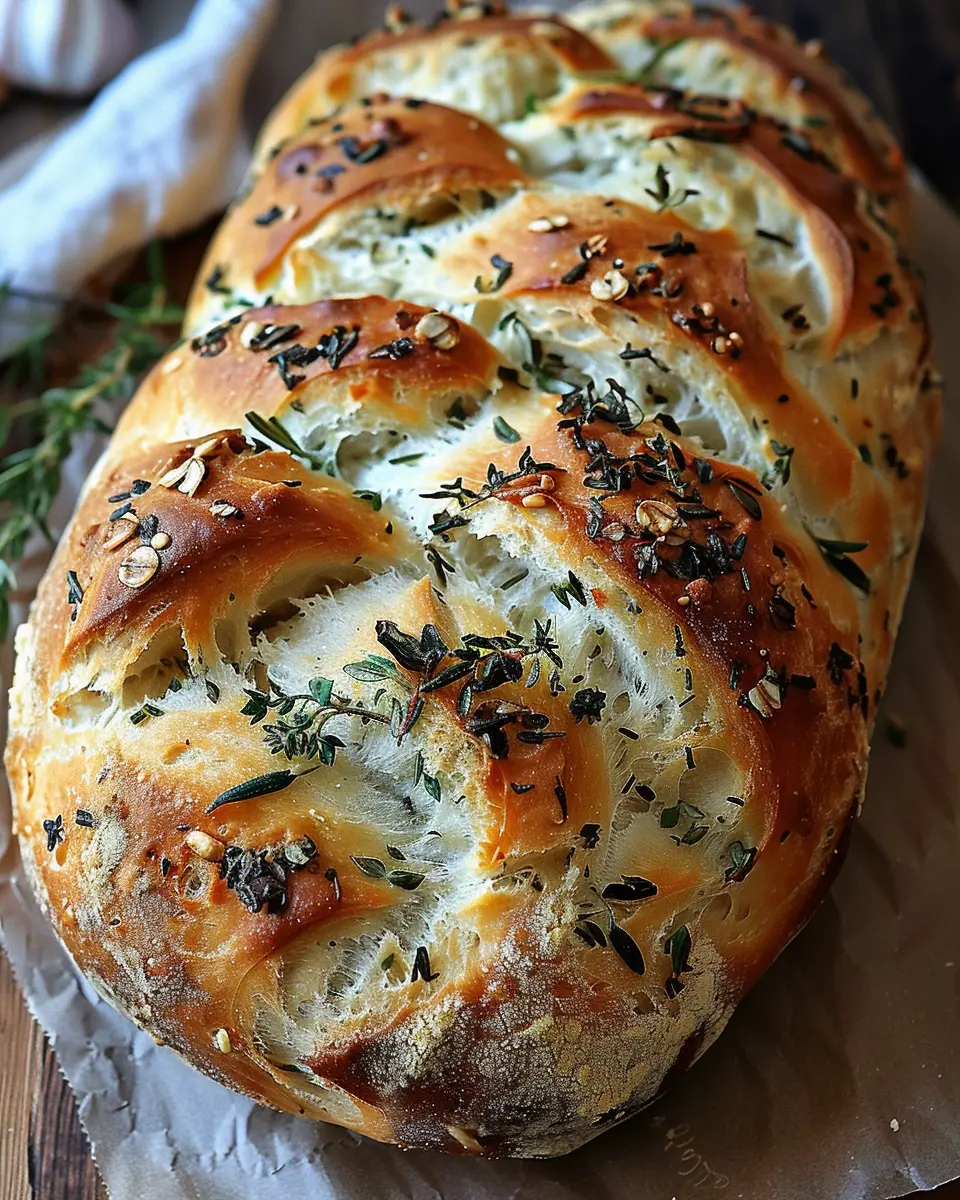
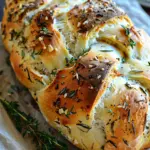
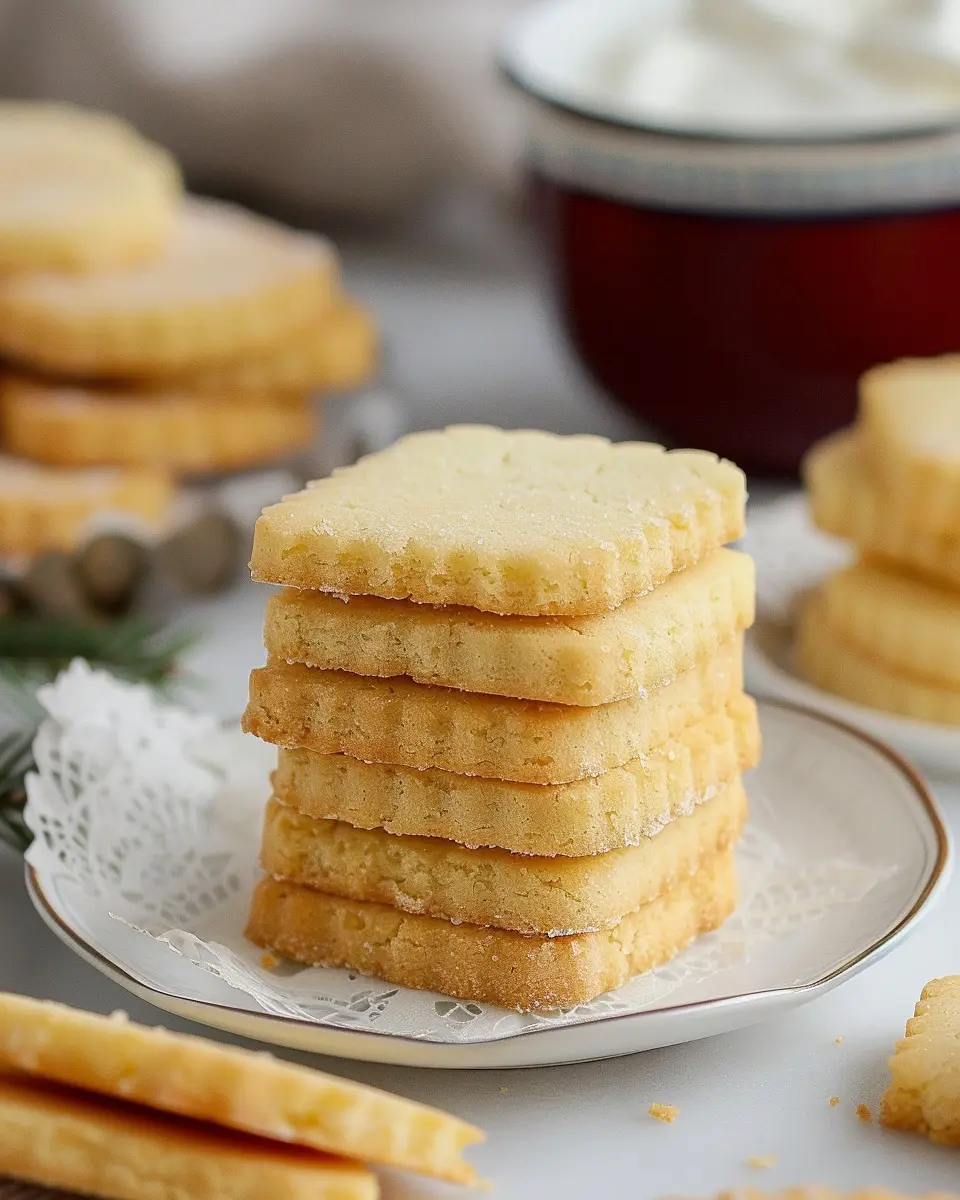
Introduction to Garlic Herb Braided Bread
If you’re a young professional navigating a busy life, you might find it challenging to spend much time in the kitchen. Yet, preparing your own meals can be both rewarding and helpful in maintaining a healthy lifestyle. One dish that stands out for its unique combination of comfort and creativity is Garlic Herb Braided Bread. This delightful bread not only fills your home with an incredible aroma but also serves as a perfect accompaniment to any meal, whether it’s a casual gathering with friends or a cozy night in.
Why is Braided Bread a Must-Try for Young Professionals?
Braided bread is more than just visually appealing—it’s a fun and charming way to showcase your culinary skills without requiring hours in the kitchen. With a little patience, you can transform simple ingredients into a stunning centerpiece. Here are a few reasons why Garlic Herb Braided Bread deserves a spot in your recipe rotation:
-
Impressive Presentation: The braided design instantly elevates a simple loaf of bread into a showstopper. Picture it on your dining table alongside a rich, buttery spread. Your friends will certainly be impressed!
-
Versatile Pairing: This lovely bread pairs well with a wide range of dishes. Whether you’re serving it alongside a warm bowl of soup, as part of a charcuterie board with turkey bacon and chicken ham, or simply enjoying it with olive oil for dipping, the options are endless.
-
A Stress Reliever: The act of kneading and braiding dough can be surprisingly therapeutic. After a long week at work, rolling up your sleeves and making bread offers a gratifying break from the hustle and bustle of everyday life.
-
Room for Creativity: While this recipe focuses on garlic and herbs, feel free to experiment with your favorite flavors. You could add cheese, olives, or even sun-dried tomatoes to make it truly your own.
Incorporating Garlic Herb Braided Bread into your cooking repertoire not only enhances your meals but also helps cultivate a sense of accomplishment. If you’re interested in exploring this delicious recipe further, check out this expert guide on homemade bread for tips and tricks that can help you on your baking journey!
Ingredients for Garlic Herb Braided Bread
Essential ingredients you’ll need
Creating the perfect Garlic Herb Braided Bread requires a handful of simple yet essential ingredients that come together to create a deliciously aromatic loaf. Here’s what you’ll need:
- All-purpose flour: The backbone of your bread, giving it structure.
- Active dry yeast: Essential for that beautiful rise—make sure it’s fresh!
- Warm water: Activates the yeast; think cozy bath temperature.
- Garlic: Fresh minced garlic packs a wonderful flavor punch.
- Mixed herbs: A blend of oregano, rosemary, or thyme will elevate your bread.
- Salt: Enhances flavor while controlling yeast activity.
- Olive oil: Adds richness and helps in achieving that golden crust.
Optional add-ins to customize your loaf
Feeling adventurous? Customize your Garlic Herb Braided Bread with the following add-ins to make it uniquely yours:
- Turkey bacon: For a smoky flavor in every bite.
- Chicken ham: Adds a savory touch that complements the garlic.
- Cheese: Try some shredded mozzarella or parmesan for extra deliciousness.
The great thing about bread-making is that there’s room for creativity! You can explore variations and flavors to tailor the recipe to your taste preferences.
For additional tips and methods on making homemade bread, check out King Arthur Baking for more inspiration.
Step-by-step preparation of Garlic Herb Braided Bread
Creating a Garlic Herb Braided Bread in your kitchen is not just about making bread; it’s an experience. Whether you’re preparing for a family dinner or simply want a comforting snack, this recipe will guide you every step of the way.
Activate the yeast for perfect rise
First things first: you need to activate the yeast. This step is crucial because it ensures that your bread will rise beautifully. In a small bowl, combine:
- 1 packet (about 2 ¼ teaspoons) of instant yeast
- 1 tablespoon of sugar
- ¾ cup of warm water (around 110°F or 43°C)
Allow this mixture to sit for about 5-10 minutes until it becomes frothy. If it doesn’t froth, your yeast might be expired or the water too hot, so start over for optimum results. According to experts from the King Arthur Baking Company, a good yeast activation is the key to achieving that fluffy texture we all adore.
Mix the wet and dry ingredients
In a mixing bowl, combine:
- 3 cups all-purpose flour
- 1 teaspoon salt
- 1 tablespoon dried herbs (like oregano, rosemary, or thyme)
After mixing the dry ingredients, create a well in the center. Pour in your activated yeast mixture and add:
- 2 tablespoons of olive oil
Stir the mixture until a shaggy dough begins to form. This is where you can truly feel that bread-making magic beginning!
Kneading the dough to develop flavor
Once your dough has come together, transfer it to a floured surface and begin kneading. This can be a workout, but it’s totally worth it. Knead the dough for about 8-10 minutes until it becomes smooth and elastic. You can tell it’s ready when it springs back to your touch and feels silky. Not only does kneading develop flavor, but it also strengthens the gluten, which is essential for that perfect chew!
The first rise: Watching the magic happen
Place your kneaded dough in a greased bowl, cover it with a clean kitchen towel, and set it in a warm spot. Ideally, let it rise for about 1 hour or until it doubles in size. You can try placing it near a sunny window or in a warm oven (turned off) for a cozy environment. It’s fascinating to watch the dough grow, isn’t it?
Shaping the dough into braids
After the first rise, punch down the dough gently to release the air. Then, divide it into three equal portions. Roll each piece into long strands, about 12 inches long. Now it’s time for the fun part! Braid the strands together, pinching the ends to secure them. Remember, it doesn’t have to be perfect; the charm lies in its homemade essence!
The second rise: Patience is key
After shaping your Garlic Herb Braided Bread, place it on a baking sheet lined with parchment paper. Cover it again and let it rise for another 30-40 minutes. This second rise is just as important as the first, as it contributes to a lighter, airier bread. Use this time to prepare your garlic herb mix — a blend of minced garlic and extra herbs can elevate the flavor even more.
Preparing for baking and optional toppings
Preheat your oven to 375°F (190°C). For an extra layer of flavor and appealing glossy finish, brush your risen bread with an egg wash made from one beaten egg mixed with a bit of water. You can also sprinkle some sea salt or more herbs on top at this point for added flavor.
Baking until golden perfection
Finally, place your Garlic Herb Braided Bread in the oven for 25-30 minutes, or until it turns a beautiful golden brown. The aroma will fill your kitchen, tempting even those who are usually uninterested in baking. When you tap the bottom of the loaf and it sounds hollow, you know it’s done!
As you take it out of the oven, let it cool for a few minutes before slicing. This bread is perfect for dipping in olive oil, serving alongside soups, or simply enjoying with a bit of butter.
Enjoy your delicious Garlic Herb Braided Bread and impress your friends and family with your baking prowess! For tips on bread variations and storage, check out reputable sources like Serious Eats or The Kitchn. Happy baking!
Variations on Garlic Herb Braided Bread
Experimenting with your Garlic Herb Braided Bread recipe can yield delightfully unique results. Here are some fantastic variations to inspire your next baking adventure!
Adding seasonal herbs for a fresh twist
Herbs are your best friends in the kitchen! Consider swapping out traditional herbs for seasonal ones to give your Garlic Herb Braided Bread a fresh flavor profile. During spring, fresh basil or dill can brighten up the dough, while basil works wonders in summer. In the colder months, thyme or rosemary can add cozy warmth. A mix of these herbs can create a garden-fresh taste that is perfect for any occasion. For inspiration on herb pairings, check out this The Spruce Eats guide.
Cheese-filled braided bread for extra flavor
Imagine pulling apart your Garlic Herb Braided Bread to reveal gooey, melted cheese nestled inside. For an irresistibly cheesy version, simply incorporate your favorite cheese, like mozzarella or cheddar, into the braided dough before sealing it. The result is a savory, cheesy explosion that elevates your bread to a whole new level. Perfect for gatherings or just a cozy night in!
A spicy garlic-herb version for heat lovers
If you crave a kick in every bite, a spicy twist on your Garlic Herb Braided Bread is just the ticket! Try adding crushed red pepper flakes, jalapeños, or even a little cayenne pepper to the dough. These additions pair wonderfully with the garlic and herbs, creating a flavor-packed bread that’s sure to impress heat lovers. Just be sure to balance the spiciness with the right amount of garlic, so it enhances the flavor without overwhelming your palate.
With these creative variations, you’ll never tire of the humble yet delectable Garlic Herb Braided Bread. Happy baking!
Cooking tips and notes for Garlic Herb Braided Bread
Tips for flawless kneading
When making your Garlic Herb Braided Bread, proper kneading is essential to develop that lovely gluten structure. Here’s how to do it perfectly:
- Use the right technique: Push the dough away with the heel of your hand, fold it back over itself, then give it a quarter turn and repeat. This method promotes even gluten development.
- Know your dough: The dough should feel smooth and elastic. If it’s too sticky, add a little flour a tablespoon at a time. Remember, you want a slightly tacky texture.
- Knead thoughtfully: Don’t rush! Aim for about 10 minutes of kneading. Not only does it make the dough manageable, but it also helps to release those fantastic flavors from the garlic and herbs.
How to ensure the perfect rise
A good rise is crucial for airy, flavorful Garlic Herb Braided Bread. Here’s how to achieve that:
- Warm environment: Yeast thrives in warmth. Find a cozy spot in your kitchen, or turn your oven to the lowest setting for a few minutes, then turn it off. Place your dough inside, covered with a damp cloth, and watch it rise beautifully.
- Double the volume: Ensure your dough has at least doubled in size during the first rise; this usually takes about 1 to 2 hours, depending on the temperature. A well-risen dough means a light texture in your finished bread.
- Patience pays off: If the dough isn’t rising as expected, check the yeast’s freshness—active dry yeast should be stored properly to maintain its potency.
For best practices and tips on yeast cooking, you can check out resources like King Arthur Baking for insights from baking experts. Each step in preparing your dough creates a complex flavor and texture, making your homemade bread a delight to share with friends and family.
Serving suggestions for Garlic Herb Braided Bread
Best pairings with your braided bread
Garlic Herb Braided Bread is versatile, making it an excellent companion for various dishes. Consider these delightful pairings:
- Soup and Stews: A warm bowl of minestrone or creamy potato leek soup enhances the bread’s flavor. The texture of the bread is perfect for dipping.
- Salads: Pair your bread with a fresh garden or quinoa salad. The herbal notes in the bread complement the crisp greens and bright dressings well.
- Cheese Platter: Combine with soft cheeses like goat cheese or sharp cheddar. As recommended by the Cheese Journal, the contrasting flavors make every bite a delight.
- Turkey Bacon or Chicken Ham Sandwiches: Elevate your sandwiches with savory Turkey Bacon or Chicken Ham for a gourmet twist.
Creative ways to enjoy leftovers
Don’t let any leftover Garlic Herb Braided Bread go to waste! Here are some fun ideas to reinvent them:
- Garlic Bread Croutons: Chop up the bread, toss it in olive oil, and bake until crispy for perfect salad toppings.
- Breakfast Strata: Layer cubed bread with eggs, cheese, and vegetables for a delicious strata that’s great for brunch!
- Pasta Bake Topper: Crumble the bread over your favorite pasta bake to add a crispy, flavorful crust.
With these suggestions, your Garlic Herb Braided Bread will not only be delicious fresh out of the oven but can transform meals throughout the week!
Time breakdown for Garlic Herb Braided Bread
Preparation time
Making Garlic Herb Braided Bread is a delightful process that kicks off with a preparation time of about 20 minutes. This allows you to gather your ingredients, mix them well, and get that dough nice and cozy for its first rise. Don’t rush this step; the aroma of fresh herbs and garlic will soon fill your kitchen!
Baking time
Once your dough is ready to go, the baking time is approximately 25-30 minutes. It’s essential to keep an eye on the bread as it turns golden brown—this is when those delicious flavors meld together perfectly.
Total time
In total, you’re looking at around 1 hour to 1 hour and 15 minutes from start to finish. This includes the preparation and baking phases, plus some rising time for that fluffy texture. So, grab your apron and enjoy the process of creating this delicious treat that could become a staple at your dinner table!
For those interested in diving deeper into bread-making techniques, check out resources from King Arthur Baking for tips to elevate your skills.
Nutritional facts for Garlic Herb Braided Bread
Calories and Section Breakdown
When it comes to enjoying Garlic Herb Braided Bread, it’s always good to know what you’re biting into. A single serving (about 1 slice) packs approximately 150 calories. This includes a delightful blend of flavors and nutrients that make each bite a treat. Here’s a quick look at the breakdown:
- Calories: 150
- Protein: 4g
- Carbohydrates: 29g
- Fat: 3g
- Fiber: 1g
Understanding these numbers helps you make informed choices about your meals, especially when paired with your favorite healthy side dishes!
Macronutrients of Your Homemade Bread
Creating your own Garlic Herb Braided Bread not only fills your home with an irresistible aroma but also lets you control what goes into it. Here’s a deeper dive into the macronutrients per serving:
- Protein: Essential for muscle repair and growth, with a wholesome 4 grams in each slice.
- Carbohydrates: With 29 grams, this will energize your day and keep you feeling full.
- Fats: Only 3 grams of fat make this a guilt-free option compared to store-bought varieties that can be loaded with preservatives and unhealthy additives.
Isn’t it great knowing exactly what you’re fueling your body with? Homemade bread is not just comforting but also a smart nutritional choice. For more insights on baking nutrition, check out Healthline’s article on whole grains.
By making informed choices around your diet, you’ll not only enjoy your delicious Garlic Herb Braided Bread but also reap the benefits of wholesome, homemade goodness.
FAQ about Garlic Herb Braided Bread
Can I use whole wheat flour?
Absolutely! Whole wheat flour is a great alternative if you’re looking for a heartier option in your Garlic Herb Braided Bread. Just keep in mind that it may change the texture slightly, making the bread denser. For best results, try mixing half whole wheat flour with half all-purpose flour to achieve that classic fluffiness while adding more nutrients.
How can I store my leftover garlic herb braided bread?
Storing your leftover Garlic Herb Braided Bread is easy! Wrap the bread tightly in plastic wrap or aluminum foil to keep it fresh. Alternatively, you can place it in an airtight container at room temperature for up to three days. If you want to keep it longer, consider freezing it. Just slice it beforehand, and then you can grab pieces as needed without defrosting the entire loaf. For freezing, wrap the sliced bread in foil or freezer-safe bags for up to three months.
What’s the best way to reheat braided bread?
Reheating your Garlic Herb Braided Bread is simple! You can use an oven, toaster oven, or even a microwave:
- Oven: Preheat to 350°F (175°C), wrap your bread in aluminum foil, and warm it for about 10-15 minutes.
- Microwave: Place a slice on a microwave-safe plate and heat for about 10-15 seconds. Just be cautious not to overdo it, as this can make the bread chewy.
Enjoying your delicious braided bread again can feel just like the first bite! For more tips, check out sources like King Arthur Baking or The Kitchn for more bread-storage techniques.
Conclusion on Garlic Herb Braided Bread
Why you should add this bread to your baking repertoire
Embracing the Garlic Herb Braided Bread in your baking routine is a decision you won’t regret. This delightful bread is not only a feast for the senses with its captivating aroma and rich flavors, but it also adds a touch of sophistication to any meal. Imagine serving this bread at your next dinner party or casual gathering with friends—it’s sure to impress!
Moreover, it’s versatile! Pair it with soups, salads, or even as a delicious base for a Turkey Bacon sandwich. The experience of kneading the dough and braiding it together can be therapeutic, making it a fun activity after a long week. Plus, you can customize the herbs to suit your palate—try rosemary or thyme for a unique twist.
So why wait? Get your hands floury, bring the family into the kitchen, and enjoy the magic of baking together. Check out these baking tips for more inspiration! This is a must-try for your collection.
PrintGarlic Herb Braided Bread: The Best Homemade Delight Awaiting You
Discover the perfect recipe for Garlic Herb Braided Bread, a delightful homemade bread enriched with the flavor of garlic and herbs.
- Prep Time: 15 minutes
- Cook Time: 30 minutes
- Total Time: 1 hour 45 minutes
- Yield: 1 loaf
- Category: Breads
- Method: Baking
- Cuisine: Italian
- Diet: Vegetarian
Ingredients
- 2 cups all-purpose flour
- 1 tablespoon active dry yeast
- 1 teaspoon salt
- 1 tablespoon sugar
- 3/4 cup warm water
- 2 tablespoons olive oil
- 2 cloves garlic, minced
- 1 tablespoon mixed herbs (such as rosemary, thyme, and oregano)
Instructions
- In a large bowl, combine warm water and sugar. Sprinkle yeast on top and let it sit for 10 minutes until frothy.
- Add flour, salt, olive oil, garlic, and herbs to the yeast mixture, and stir until a dough forms.
- Knead the dough on a floured surface for about 5-7 minutes until smooth.
- Place the dough in a greased bowl, cover with a cloth, and let it rise in a warm place for 1 hour, or until doubled in size.
- Punch down the dough and divide it into three equal pieces.
- Roll each piece into a long rope and braid them together.
- Place the braided dough on a baking sheet and let it rise for another 30 minutes.
- Bake in a preheated oven at 375°F (190°C) for 25-30 minutes or until golden brown.
- Allow to cool before slicing and serving.
Notes
- For extra flavor, brush the braided bread with garlic butter just before serving.
- Experiment with different herbs according to your taste preferences.
Nutrition
- Serving Size: 1 slice
- Calories: 150
- Sugar: 1g
- Sodium: 200mg
- Fat: 5g
- Saturated Fat: 1g
- Unsaturated Fat: 3g
- Trans Fat: 0g
- Carbohydrates: 22g
- Fiber: 1g
- Protein: 4g
- Cholesterol: 0mg


")