
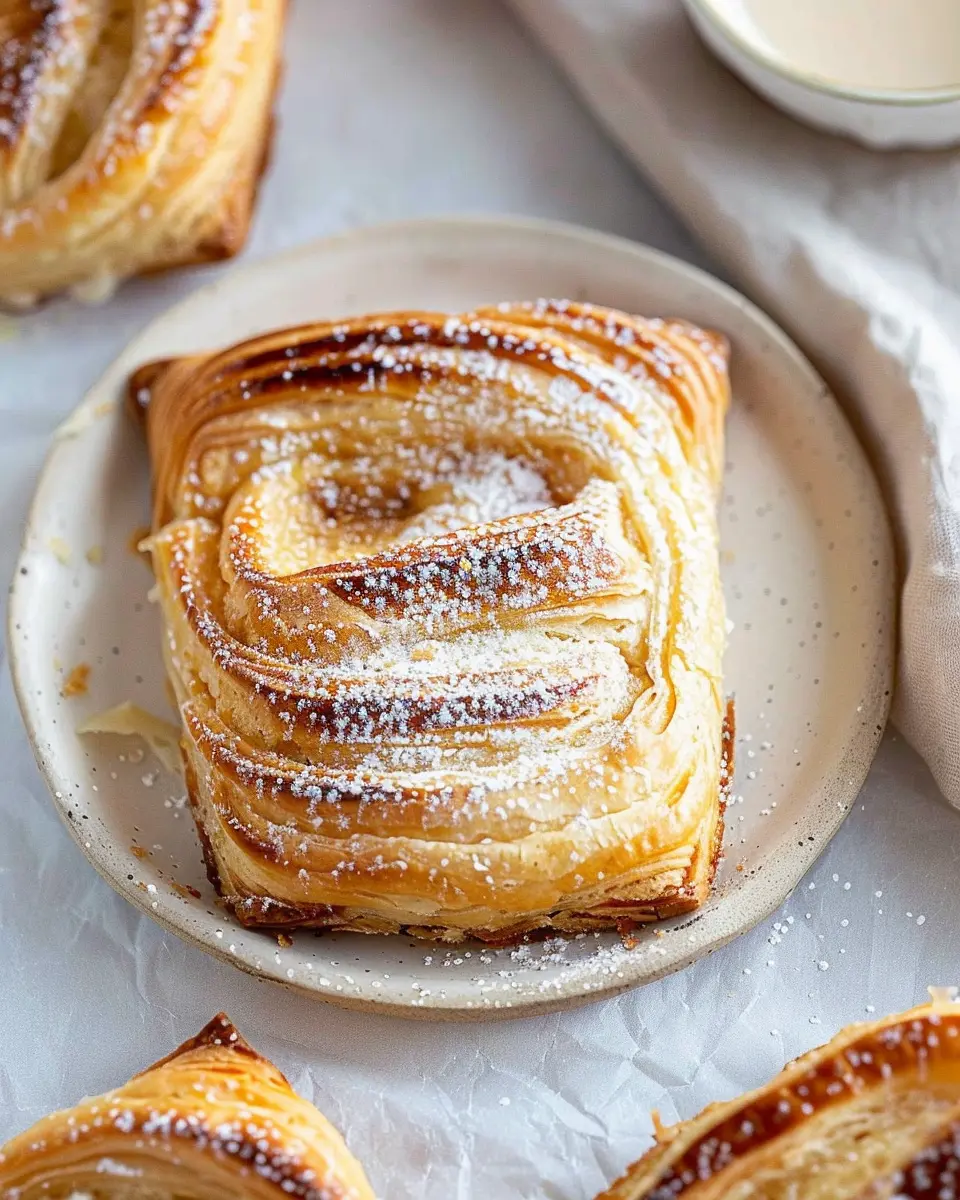
Homemade Starbucks Cheese Danish: A Delightful Recipe
Why Choose Homemade Over Store-Bought?
When it comes to breakfast or brunch, the allure of a homemade Starbucks cheese danish might just win you over. But why should you consider making it yourself instead of grabbing one on your next coffee run? Here are a few reasons to roll up your sleeves and get baking.
First off, the taste is simply unbeatable. When you make your cheese danish at home, you can tailor the flavors to your liking. Use fresh, high-quality ingredients, like creamy cream cheese and a sprinkle of your favorite flavors—think vanilla or lemon zest. Store-bought danishes often contain preservatives that can dull that homemade flavor and texture. If you’re curious about exploring fresh ingredients, check out Food52 for some great inspiration.
Creating your own pastries also means you can experiment freely with textures and fillings. Want to swap out the classic cheese filling for something more adventurous, like a berry compote or Nutella? Go for it! Who says cheese danishes have to be traditional?
Moreover, making your homemade Starbucks cheese danish can be a delightful experience. Picture this: early morning sunlight streaming into your kitchen, the smell of buttery pastry wafting through the air. There’s something wonderfully satisfying about crafting your food from scratch. It can even be a fun activity to involve friends or family in. Plus, it gives you an excellent backstory for when you serve your creations at brunch—you made them yourself!
Lastly, when you bake at home, you have control over your portion sizes, which is great if you are watching your diet or simply want to indulge without guilt. Control over the ingredients and the benefits of fresh-made pastries can lead to a healthier version of your favorite treat.
So why not give it a try? Your taste buds will thank you, and you might just discover a new favorite weekend ritual. Check out our full recipe to dive into the fun of creating your own delicious cheese danish!
Ingredients for Homemade Starbucks Cheese Danish
Essential ingredients you’ll need
Creating a delightful homemade Starbucks cheese danish takes a few key ingredients that come together to deliver that iconic flavor. Here’s what you’ll need:
- Puff pastry: The flakiness is key, so using store-bought puff pastry saves you time without sacrificing quality.
- Cream cheese: This is where the magic happens! Full-fat cream cheese gives the perfect richness.
- Granulated sugar: Just a little sweetness to balance the cream cheese.
- Egg yolk: This adds both richness and helps bind the filling.
- Vanilla extract: A splash of this enhances the overall flavor profile.
- Powdered sugar: For that delightful drizzle on top.
Optional ingredients for unique flavors
Want to add a twist to your homemade Starbucks cheese danish? Consider these optional ingredients:
- Lemon zest: Brightens up the filling with fresh citrus notes.
- Almond extract: Offers a lovely nutty aroma; just a drop will do!
- Fresh berries: A burst of seasonal fruit can make this danish pop.
- Cinnamon: A dash can complement the sweetness beautifully.
Experiment with these to find your perfect version, and don’t be afraid to get creative! For more baking tips, check out King Arthur Baking.
Preparing Your Homemade Starbucks Cheese Danish
Creating your own homemade Starbucks cheese danish is not just a delightful kitchen adventure but also an opportunity to impress your friends and family with a delectable treat. Let’s dive into each step to ensure you achieve that perfect, flaky, and creamy goodness.
Gather and Prepare Your Ingredients
To kick things off, let’s gather everything you need. Having your ingredients prepped not only makes the cooking process smoother but adds a sprinkle of joy to your kitchen experience. Here’s a simple checklist:
- Puff Pastry: You can usually find this in the frozen section of your grocery store. Aim for quality, as this is what will bring that special flaky texture.
- Cream Cheese: Softened to perfection; this will be your filling.
- Sugar: Granulated, for sweetness.
- Vanilla Extract: A splash goes a long way in flavor.
- Egg: To create the luscious filling and for egg wash.
You might find it helpful to check out how to work with frozen puff pastry here for more tips!
Roll and Cut the Puff Pastry
Now that you have your ingredients ready, it’s time to work with the puff pastry. Roll it out onto a lightly floured surface to prevent any sticking. You want to ensure that it’s about a quarter-inch thick, which helps it puff beautifully as it bakes.
- Cutting: Use a sharp knife or a pizza cutter to slice the pastry into squares or rectangles, depending on your preference. Each piece should be about 4 inches wide. This gives you enough room to create your danish shape.
A little tip: Don’t worry if they aren’t all perfectly even. Remember, they’ll be topped with that delicious cream cheese filling, so any imperfections will be hidden.
Make the Cream Cheese Filling
While the pastry is resting, let’s prepare the cream cheese filling.
- Take your softened cream cheese and place it in a mixing bowl.
- Add in sugar – start with about ¼ cup and adjust to taste.
- Don’t forget about one teaspoon of vanilla extract for that comforting flavor.
- Mix thoroughly until you have a smooth, creamy consistency.
Feel free to experiment here! Some people enjoy adding a touch of lemon zest for a refreshing twist, or a sprinkle of cinnamon for warmth. What flavor combination sparks your creativity?
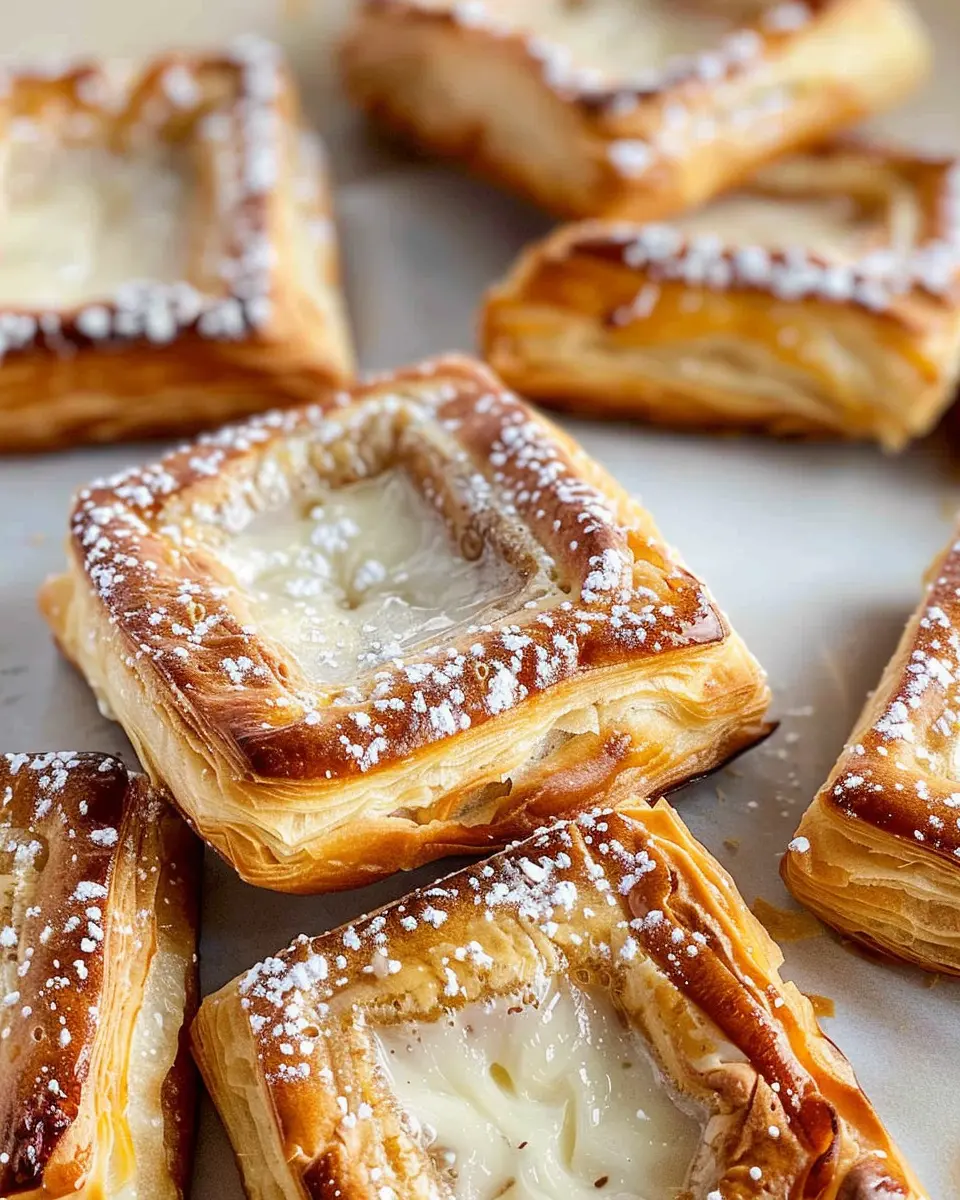
Assemble Your Cheese Danishes
This is the fun part!
- Take each puff pastry square and place a generous dollop of your cream cheese filling in the center.
- Fold the corners of the pastry over the filling, overlapping them to create a beautiful pocket. You can also pinch the edges to secure everything in place.
- If you want to get fancy, brush the tops with beaten egg to give them that golden hue when baked.
Remember, this is your homemade Starbucks cheese danish, so make it uniquely yours!
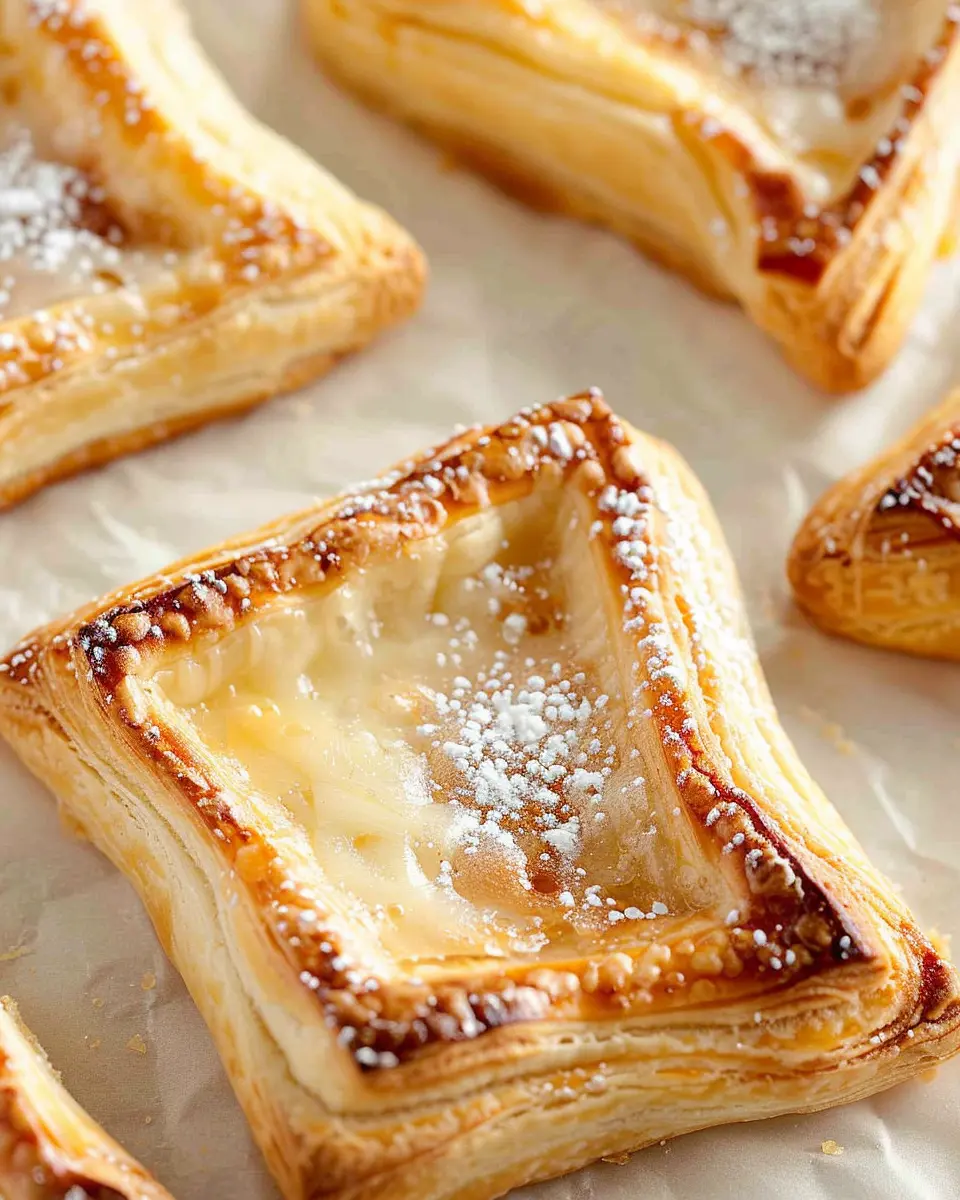
Bake to Golden Perfection
Preheat your oven to 375°F (190°C) to ensure a nice, even bake. Line a baking sheet with parchment paper to prevent sticking and make cleanup a breeze.
- Place your assembled danishes on the sheet and pop them in the oven.
- Bake for about 20-25 minutes or until they are gloriously puffed and golden brown.
Once out of the oven, let them cool just enough to handle, then enjoy the aromatic experience as you take your first bite. Pair it with a cup of coffee for the ultimate homemade café experience.
Creating your own homemade Starbucks cheese danish is not just about crafting a snack; it’s about enjoying the process and savoring the final result. Happy baking!

Creative Variations on the Classic Cheese Danish
When you dive into making a homemade Starbucks cheese danish, you might just find your creativity soaring! This delightful pastry is the perfect canvas for your culinary twists. Here are a couple of fun ideas to elevate this classic treat:
Adding Fruit Toppings for Freshness
Imagine biting into your fresh danish, only to discover the bright burst of seasonal fruits. Strawberries, blueberries, or raspberries can add that refreshing element to your homemade Starbucks cheese danish. Simply add a layer of fresh fruit or fruit preserves on top of the cheese filling before baking. Not only do fruits contribute vibrant colors, but they also infuse a natural sweetness. For a tangy twist, try a touch of lemon zest in your cheese mixture, balancing out the flavors beautifully. Check out this resource on seasonal fruits to inspire your fruit choices!
Incorporating Chocolate or Spices for a Twist
If you’re a chocolate lover or someone who enjoys a hint of spice, consider folding some finely chopped chocolate or even a sprinkle of cinnamon into your cream cheese mixture. This will not only amp up the flavor of your homemade Starbucks cheese danish but also give it that unexpected surprise your taste buds are craving. For an extra special flair, you could drizzle melted chocolate on top or add a pinch of cardamom or nutmeg to the filling. Experimenting with flavors can transform your baking adventures into something extraordinary!
Feel free to mix and match these suggestions! Each variation brings its unique touch, allowing you to impress your friends at brunch or simply treat yourself to a delightful dessert. Happy baking!
Cooking Tips and Essential Notes for Best Results
Ensuring the Perfect Puff Pastry Texture
To achieve that delectable, flaky texture in your homemade Starbucks cheese danish, start with cold ingredients. When working the butter into the flour, keep it chilled to help create those dreamy, airy layers. A quick tip: consider using a food processor for a more consistent blend, but don’t over-process; you want small pea-sized bits of butter for the best results. Remember that rolling and folding the dough a few times will encourage the pastry to rise beautifully in the oven.
Importance of Room Temperature Ingredients
When it comes to the cream cheese filling, using room-temperature ingredients is key. This not only allows for easier mixing but also ensures a smooth, creamy texture. If you’re short on time, cut the cream cheese into small cubes and leave it out for about 30 minutes. It’ll whip up better and evenly blend with sugar and vanilla for that luscious filling.
For more baking tips, check out King Arthur Baking for expert insights. Happy baking!
Serving Suggestions for Your Cheese Danish
Pairing with Coffee or Tea
One of the best ways to enjoy your homemade Starbucks cheese danish is with a comforting cup of coffee or soothing tea. Rich, aromatic coffees like a latte or espresso beautifully contrast the creamy cheese filling, enhancing its flavor profile. If you prefer tea, consider a classic like Earl Grey or a vibrant green tea, which can provide a refreshing balance. Don’t forget to check out specialty blends at Adagio Teas for unique options!
Ideal Breakfast or Snack Time Options
This delightful pastry is perfect for various occasions. Enjoy it as a quick breakfast while rushing to work or savor it during a leisurely weekend brunch with friends. You can even serve it as an afternoon snack alongside some fresh fruit. To elevate your cheese danish experience, consider adding sides like Turkey Bacon or Chicken Ham for a savory contrast. Alternatively, a scoop of Greek yogurt complements the sweetness perfectly while adding protein to your meal.
Ultimately, your homemade Starbucks cheese danish can adapt to any time of day, making it a versatile treat!
Time Breakdown for Preparing Cheese Danish
Preparation Time
Preparing your homemade Starbucks cheese danish begins with a cozy 15-20 minutes of setup. Gather your ingredients and tools, and you’ll be on your way to pastry perfection in no time! Make sure to preheat your oven during this phase to save some extra minutes later.
Cooking Time
Once your danishes are ready to bake, they’ll need about 25-30 minutes in the oven. This is when the magic happens! The aroma of baked cheese and pastry will fill your kitchen, making the wait worthwhile.
Total Time
In total, you’re looking at around 40-50 minutes from start to finish. Between preparing, resting, baking, and savoring the results, this delightful journey is well worth the short time investment. So, are you ready to treat yourself with a delicious homemade Starbucks cheese danish? For even more tips and tricks on baking success, check this helpful guide from King Arthur Baking!
Nutritional Facts for Your Homemade Cheese Danish
Calories and Macronutrients
When you’re indulging in a homemade Starbucks cheese danish, it’s good to know what’s in it. Each serving typically contains around 300-400 calories, giving you a satisfying treat without derailing your day. Here’s a closer look at the macronutrients:
- Carbohydrates: 40-50g
- Protein: 6-8g
- Fats: 15-20g
For those tracking their macros, it’s also worth noting that the fats mainly come from cream cheese and butter, which offer richness and flavor.
Key Vitamins and Minerals
While your delicious homemade Starbucks cheese danish is a treat, it also supplies some essential nutrients:
- Calcium: Great for bones; found in the cream cheese.
- Vitamin A: Supports eye health and immunity; provided by butter and cheese.
- B Vitamins: Vital for energy metabolism; found in the dough.
For an extra nutritional boost, consider adding fresh fruits or nuts that can complement the flavors and enhance the health benefits of your homemade treat. If you’re keen to learn more about nutrition in baked goods, check out the resources from the USDA or Harvard Health.
Enjoy crafting your homemade cheese danish, knowing that it brings both flavor and nutrition to your table!
FAQs About Homemade Starbucks Cheese Danish
When diving into the delicious journey of crafting your own homemade Starbucks cheese danish, you’ll inevitably have some questions. Here are answers to a few common inquiries.
Can I freeze leftover cheese danishes?
Absolutely! Freezing your homemade Starbucks cheese danish is a great way to enjoy them later. Simply wrap each danish individually in plastic wrap and then place them in a freezer-safe bag. They can last up to three months in the freezer. When you’re ready to indulge, thaw them in the fridge overnight and warm them in the oven at 350°F for about 10 minutes for that freshly-baked taste.
How can I make the filling richer?
If you want an extra luscious filling for your homemade Starbucks cheese danish, consider adding a splash of vanilla extract or a pinch of lemon zest to the cream cheese mixture. You could also incorporate a mix of cream cheese and mascarpone for a creamier texture. Some bakers even like to fold in a handful of chocolate chips or fruit preserves for a delightful twist!
What are some common mistakes to avoid?
Creating the perfect homemade Starbucks cheese danish can be tricky. Here are some pitfalls to watch out for:
- Overworking the dough: This can lead to tough, chewy pastries. Be gentle!
- Skipping the chill time: Allow your dough to rest in the fridge for optimal flakiness.
- Not preheating the oven: Make sure your oven is ready to go before popping in those danishes to ensure even baking.
With these tips and a bit of practice, you’ll be well on your way to cheese danish perfection! If you’re keen for further inspiration, consider checking out resources like King Arthur Baking for expert baking tips. Happy baking!
Conclusion: Enjoying Your Homemade Cheese Danish
Why it’s worth making at home!
Creating your own homemade Starbucks cheese danish not only brings the delightful taste of your favorite café to your kitchen, but it also allows you to customize it to your liking. You can experiment with fillings, sweetness levels, and even try adding a personal twist!
- Freshness: Enjoying a danish straight from your oven is a treat that store-bought can’t match. The aroma of baked goods filling your home is simply unbeatable.
- Healthier Ingredients: By making it at home, you control the ingredients, opting for fresher or organic options that keep things a bit healthier.
- Cost-effective: Save money while indulging your sweet tooth. Homemade treats are often a fraction of the café price.
So, gather your ingredients and start enjoying this delightful adventure in baking. For a deeper dive into the benefits of homemade pastries, check out Food Network where you can explore more recipes and baking tips! What will your first homemade cheese danish filling be?
PrintHomemade Starbucks Cheese Danish: Easy Indulgence for Any Occasion
Enjoy a delightful replica of the Starbucks Cheese Danish with this easy homemade recipe.
- Prep Time: 20 minutes
- Cook Time: 20 minutes
- Total Time: 40 minutes
- Yield: 8 servings
- Category: Dessert
- Method: Baking
- Cuisine: American
- Diet: Vegetarian
Ingredients
- 1 package puff pastry
- 8 ounces cream cheese
- 1/2 cup powdered sugar
- 1 teaspoon vanilla extract
- 1 egg (beaten, for egg wash)
- 3 tablespoons fruit preserves (optional)
Instructions
- Preheat oven to 400°F (200°C).
- Roll out the puff pastry on a floured surface and cut into squares.
- In a bowl, mix the cream cheese, powdered sugar, and vanilla until smooth.
- Place a spoonful of the cheese mixture in the center of each pastry square.
- Fold the corners of the pastry over the filling and seal.
- Brush the tops with beaten egg.
- Bake for 15-20 minutes or until golden brown.
- Optional: Top with fruit preserves before serving.
Notes
- Use thawed puff pastry for best results.
- Experiment with different fruit preserves for variety.
Nutrition
- Serving Size: 1 danish
- Calories: 250
- Sugar: 5g
- Sodium: 150mg
- Fat: 15g
- Saturated Fat: 8g
- Unsaturated Fat: 5g
- Trans Fat: 0g
- Carbohydrates: 25g
- Fiber: 1g
- Protein: 3g
- Cholesterol: 40mg


")