

Introduction to Milk Brioche
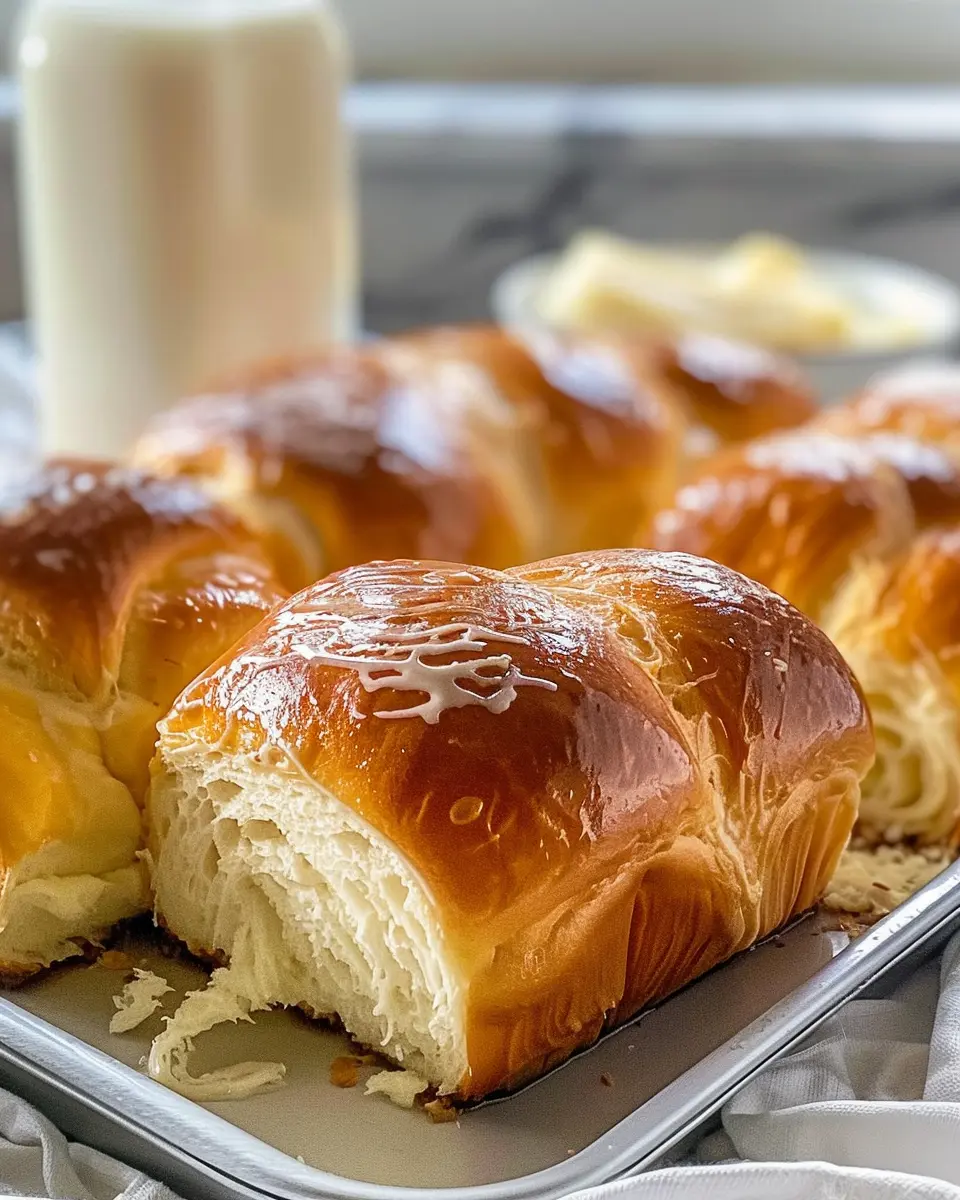
When it comes to homemade baked goods, few things offer the comforting, indulgent experience of milk brioche. This soft, buttery bread is the epitome of comfort food, perfect for a morning treat or an elegant pairing with dinner. So, why should milk brioche be on your radar? Let’s dive into the reasons this delightful bread stands out.
Why Milk Brioche is the Perfect Homemade Treat
1. Versatility at Its Best:
Milk brioche can effortlessly transition from breakfast to dessert. Whether you enjoy it toasted with a smear of butter and your favorite jam or use it for French toast, its rich texture elevates any meal. What about using it for sandwiches? Imagine turkey bacon or chicken ham nestled between slices of this tender delight—the perfect choice for lunch or brunch.
2. Simple Ingredients, Spectacular Results:
Crafting milk brioche at home requires basic ingredients, but the results are anything but ordinary. Flour, eggs, milk, sugar, and butter come together to create a dough that’s both easy to work with and a joy to knead. With just a bit of patience for the rising time, you’ll create something that might just earn a spot in your regular baking rotation.
3. Nutritional Benefits:
While indulgent, homemade brioche can also offer nutritional perks. The milk provides necessary calcium and proteins, and it can be made with whole-wheat flour for added fiber. Plus, you control the sugar—you might be surprised at how satisfying a less-sweet version can be. For tips on making healthier baked goods, check out this resource on baking alternatives.
4. The Art of Baking:
Baking milk brioche is not just about following a recipe; it’s about the joy of creating something from scratch. Each step—from mixing the dough to watching it rise—can be a therapeutic process. The aroma that fills your kitchen is a reward in itself.
There’s a certain magic that happens when you see your bread transform in the oven. So, whether you’re a seasoned baker or just starting out, making milk brioche is a worthwhile endeavor that results in a delicious treat you’ll feel proud to serve. Are you ready to embrace the delightful world of homemade baked goods? Your journey toward perfecting milk brioche starts here!
Ingredients for Milk Brioche
Creating a delicious milk brioche begins with a selection of essential ingredients that come together to create the perfect soft and fluffy loaf. Let’s break it down:
Essential Ingredients
To make a classic milk brioche, you will need:
- All-purpose flour: Offers the right structure for your bread.
- Milk: Whole milk adds richness and moisture to the dough.
- Yeast: Active dry or fresh yeast will give your brioche that delightful rise.
- Sugar: Just a hint of sweetness to elevate the flavor.
- Salt: Balances the sweetness and enhances the overall taste.
- Eggs: Large eggs make for a tender, airy texture.
- Butter: High-quality unsalted butter helps create that signature golden crust and rich flavor.
Optional Ingredients for Variation
Feel free to get creative with your milk brioche! Here are some optional ingredients you could consider:
- Cinnamon or Nutmeg: A sprinkle of spice can elevate the flavor.
- Zest from Citrus Fruits: Adds a touch of freshness.
- Dried Fruits: Such as raisins or cranberries for a sweet twist.
- Nuts: Chopped pecans or almonds for crunch.
For more expert tips on making the perfect milk brioche, you can check out sources like The Kitchn or Serious Eats. Happy baking!
Preparing Milk Brioche
Milk brioche is a delightful bread enriched with milk, butter, and eggs that gives it a soft, fluffy texture and a hint of sweetness. Perfect for breakfast or a snack, making milk brioche from scratch may seem daunting at first, but with this guide, you’ll feel confident in your baking abilities. Let’s roll up our sleeves and dive into the process together!
Gather Your Ingredients
Before you begin, it’s essential to prepare the dough ingredients.
You’ll need:
- 4 cups of all-purpose flour
- 1/4 cup of granulated sugar
- 1 packet (2 1/4 teaspoons) of active dry yeast
- 1 teaspoon of salt
- 3 large eggs
- 1 cup of milk, warm (110°F)
- 1/2 cup of unsalted butter, softened and cut into pieces
Having everything ready will not only streamline your baking experience but also prevent any last-minute dashes to the store.
Mix and Knead the Dough
It’s time to mix and knead the dough. Start by combining the warm milk and yeast in a large mixing bowl. Allow it to sit for about 5 minutes until it’s foamy—this means your yeast is active and ready to do its job.
Add in the sugar, salt, and eggs, followed by the flour. Mix until well combined. Once it forms a shaggy dough, transfer it to a floured surface and knead for about 10 minutes. The dough should become smooth and elastic. For best results, consider using a stand mixer with a dough hook attachment if you have one; it takes the hard work out of kneading!
Let the Dough Rise
Next, the first proofing time comes into play. Place your kneaded dough into a greased bowl, cover it with a clean kitchen towel or plastic wrap, and let it rise in a warm area for about 1 to 2 hours. The dough should double in size, indicating that it’s ready for the next step. You could also learn more about the science behind proofing in this article from King Arthur Baking for an expert perspective on yeast activity.
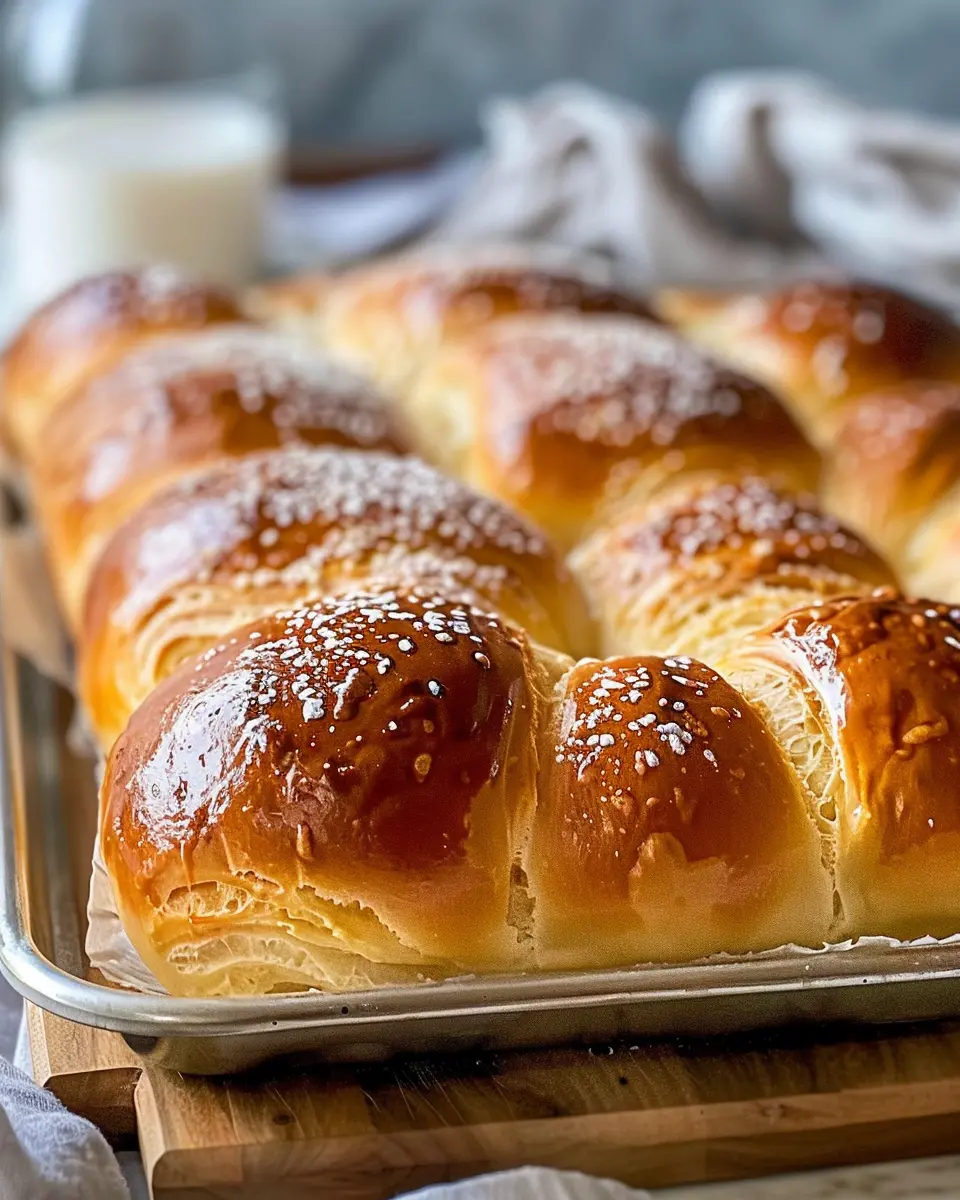
Shape Your Brioche
Once your dough has risen, it’s time to have some shaping fun! Divide the dough into smaller pieces—typically around 8 to 12, depending on how large you want your brioche. Roll each piece into a ball, and if you’re feeling adventurous, you can create small, decorative shapes or even twists.
Place your shaped dough in a buttered loaf pan or individual brioche molds if you have them. This will help them rise and develop that lovely brioche structure.
Give It a Second Rise
Now comes the second proofing time. Cover the shaped doughs again and let them rise for another hour. This step is crucial because it results in a soft, airy brioche. You can preheat your oven to 350°F (175°C) during this period so it’s ready for baking as soon as your dough has puffed up beautifully.
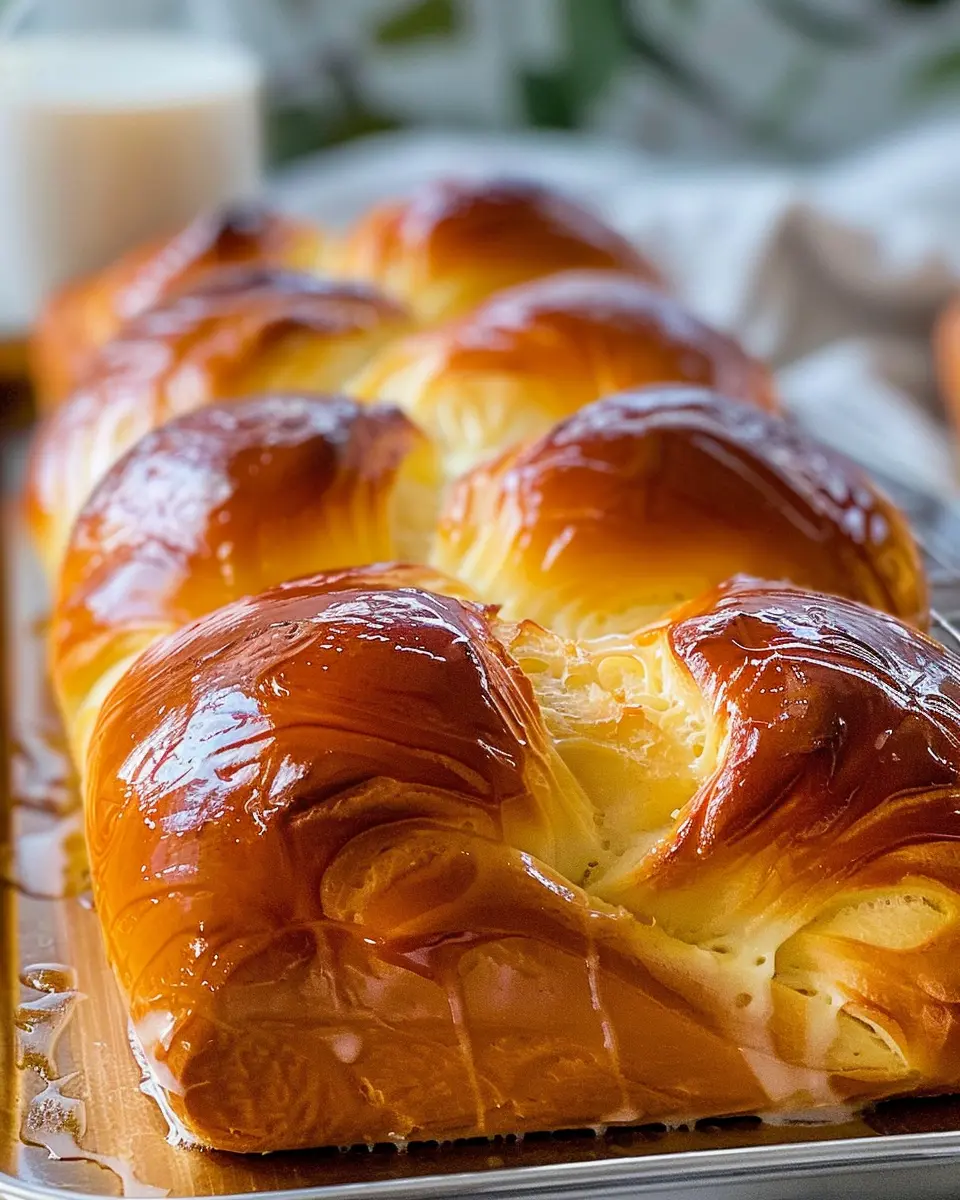
Bake to Perfection
Finally, it’s time to bake the brioche. Place your risen dough into the preheated oven and bake for 25 to 30 minutes or until golden brown. A great way to check for doneness is to tap the bread; it should sound hollow. During baking, the kitchen will be filled with a heavenly aroma that will make all your efforts worthwhile.
Once done, allow the brioche to cool on a wire rack. You can enjoy it plain, with a smear of butter, or even with turkey bacon or chicken ham for those exciting brunch occasions.
With these steps, you’ve successfully mastered your own milk brioche. Enjoy every slice and savor the satisfaction of creating something wonderful from scratch!
Variations on Milk Brioche
If you think classic milk brioche is delightful on its own, wait until you try these exciting variations! Each option brings a unique twist, making them perfect for breakfast, brunch, or even as a gourmet snack. Let’s dive into three mouthwatering alternatives that are sure to impress your friends and family.
Chocolate Chip Milk Brioche
For a sweet indulgence, consider adding chocolate chips to your milk brioche. Simply fold in about a cup of your favorite chocolate chips into the dough just before the final rise. The result? A deliciously sweet bread with pockets of melted chocolate that will bring joy to any chocolate lover’s heart. Pair it with a cup of coffee for a delightful morning treat.
Savory Milk Brioche with Herbs
Looking for something on the savory side? Craft a milk brioche infused with fresh herbs. Chopped rosemary, thyme, or basil can transform this classic into an aromatic experience. Mix in about two tablespoons of your chosen herbs with the dough for an enticing flavor profile that pairs beautifully with cheese or charcuterie boards. This variation is perfect for dinner parties or elevated picnics.
Brioche Rolls with Turkey Bacon and Chicken Ham
If you’re in the mood for something filling, try making brioche rolls stuffed with turkey bacon and chicken ham. Prepare your milk brioche dough as usual, roll it out, and add a generous layer of cooked turkey bacon and diced chicken ham. Roll them up and bake. Not only do these rolls make fantastic sandwiches, but they also serve as a hearty snack during game days or family gatherings.
Feel free to explore and adapt these ideas to suit your tastes. Happy baking, and enjoy the journey of creating delicious milk brioche variations! For more culinary inspiration, check out resources from food blogs like Serious Eats and Bon Appétit.
Baking tips for Milk Brioche
Overcoming common challenges
Baking milk brioche can sometimes feel daunting, especially if you’re new to yeast breads. One common challenge is ensuring the dough rises properly. Make sure your yeast is fresh and activate it in warm milk, not boiling! If your kitchen is chilly, consider using an oven with just the light on as a warm corner for rising.
Another tricky aspect can be achieving that golden crust. Brush the loaf with an egg wash before baking for a beautiful finish and delicious sheen.
How to achieve the perfect texture
To get that signature soft and airy texture in your milk brioche, invest a little time in the kneading process. Knead until it’s smooth and elastic, which usually takes around 10 minutes by hand or 5 in a stand mixer. Don’t rush the first rise; letting it double in size will enhance your loaf’s fluffiness.
Resist the temptation to add extra flour while kneading, as this can lead to a denser bread. Remember, baking is a science and precision is key!
For more tips on yeast bread baking, check out this helpful guide from King Arthur Baking. Links like these can offer inspiration and clarity as you perfect your milk brioche recipe. Happy baking!
Serving suggestions for Milk Brioche
Breakfast ideas with milk brioche
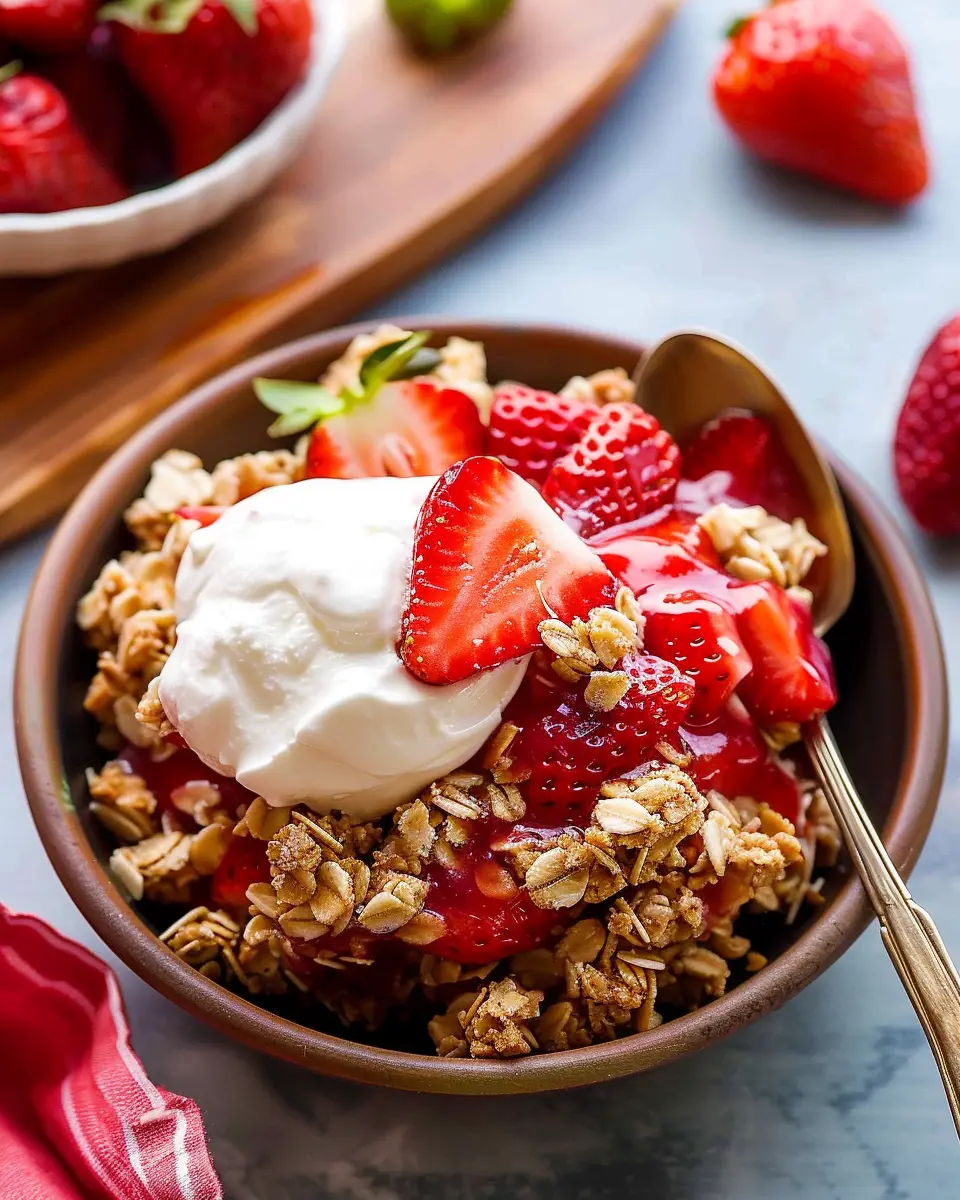
Starting your day with milk brioche is a delightful choice! Imagine fluffy slices toasted to perfection, slathered in creamy butter and a splash of your favorite fruit jam. For a heartier option, why not try French toast? Dip the brioche in a mixture of eggs, milk, and a hint of cinnamon, then pan-fry until golden brown. Top it with fresh berries and a drizzle of maple syrup for an irresistible morning treat. You might also enjoy serving milk brioche alongside scrambled eggs and Turkey Bacon for a balanced breakfast.
Serving as a dessert
Transform your milk brioche into an elegant dessert with ease. Consider bread pudding as a crowd-pleaser; simply cube the brioche, mix with eggs, cream, and sugar, then bake until set. Adding raisins or chocolate chips can amp up the flavor, making it a comforting finish to any meal. Alternatively, a milk brioche bread and butter pudding topped with a scoop of vanilla ice cream is a classic way to impress guests. You could even serve it with a homemade custard sauce—a luxurious pairing. For more cooking inspiration, check out this recipe guide.
Whether it’s breakfast or dessert, milk brioche can elevate your menu to new heights!
Tips for Perfecting Milk Brioche
Timing and Technique Considerations
Perfecting your milk brioche starts with paying attention to timing. Yeast thrives in warm conditions but can be sensitive to heat, so be mindful of your kitchen temperature. Allow your dough to rise in a warm, draft-free spot; it typically takes about 1-2 hours for the first rise. You can also consider the delayed fermentation method — let the dough sit in the fridge overnight. The flavors develop beautifully and create a more complex taste!
When you’re shaping your brioche, don’t rush. A gentle touch goes a long way in maintaining the airy structure of the dough.
Best Practices for Dough Consistency
Achieving the perfect consistency in your milk brioche dough is crucial. Aim for a dough that is slightly tacky but not overly sticky. If it sticks too much to your fingers, add a bit more flour, a tablespoon at a time. Conversely, don’t overload it with flour, as this can lead to a dense end product.
Keep in mind:
- Use high-quality flour for a better rise and texture.
- Knead thoroughly until the dough is smooth and elastic; this usually takes about 10-15 minutes by hand.
With these tips and a sprinkle of patience, you’ll be on your way to creating melt-in-your-mouth milk brioche that your friends and family will rave about! For more expert insights on bread-making techniques, check out resources like King Arthur Baking.
Time breakdown for Milk Brioche
When you’re ready to dive into the delightful world of milk brioche, understanding the timing can make your baking experience seamless and enjoyable. Here’s a quick breakdown of the time you’ll invest in this delicious bread.
Preparation time
Getting everything ready for your milk brioche takes about 20-30 minutes. This includes measuring your ingredients, mixing the dough, and setting up your workspace. It’s a simple process, so gather your tools and ingredients, and you’re good to go!
Rising time
One of the key steps in making milk brioche is allowing the dough to rise properly. You’ll need to set aside around 1 to 2 hours for the initial rise, depending on your kitchen temperature. The warmer it is, the quicker your dough will rise.
Baking time
The baking itself is quite quick, taking around 25-30 minutes. Keep an eye on it, as you want a beautiful golden color to signal that your milk brioche is perfectly baked.
Total time
In total, from preparation to that first warm slice, you’re looking at around 2.5 to 3 hours. This might sound like a significant chunk of time, but much of it is hands-off while your dough is rising and baking.
Baking can be wonderfully therapeutic, so why not put on your favorite music or podcast? For more tips on nurturing your skills, check out resources like Serious Eats or America’s Test Kitchen for expert advice and recipes. Happy baking!
Nutritional Information for Milk Brioche
When indulging in a slice of milk brioche, it’s helpful to know what you’re enjoying! Here’s a quick overview of the nutritional content that makes this delightful treat a perfect companion for your morning coffee or afternoon snack.
Calories
A single serving of milk brioche contains approximately 250 calories. While this might seem a bit indulgent, it fits well into a balanced diet, especially when enjoyed in moderation.
Carbohydrates
With roughly 32 grams of carbohydrates per serving, this brioche is rich in energy-giving complex carbs. It’s the ideal pick-me-up during those long work days when you need something delicious yet satisfying.
Protein
Each delightful slice offers about 6 grams of protein. While this isn’t a high-protein treat, pairing your milk brioche with some turkey bacon or chicken ham can help boost your protein intake for a more balanced meal.
Whether you’re enjoying milk brioche for breakfast or as a sweet afternoon treat, knowing its nutritional value can help you savor each bite with confidence. For more insights on nutrition, check out resources from Healthline or the USDA FoodData Central.
FAQs about Milk Brioche
What makes milk brioche different from regular bread?
Milk brioche stands out because it’s rich, buttery, and made with milk, giving it a sweet, tender crumb that you won’t find in regular bread. This unique combination of ingredients results in a soft, fluffy texture that’s perfect for breakfast or as a decadent base for sandwiches. Unlike most bread, which relies heavily on water, milk brioche uses milk to enhance both flavor and moisture, making each bite truly delightful.
How do I store leftovers?
If you find yourself with leftover milk brioche, the key is to keep it fresh! Wrap it tightly in plastic wrap or place it in an airtight container to retain its moisture. Ideally, it should be stored at room temperature for up to 3 days. If you notice it starting to get stale, don’t fret; you can always revive it with a quick toast.
Can I freeze milk brioche?
Absolutely! Freezing milk brioche is a fantastic way to extend its shelf life. Slice the brioche before freezing to make it easier to grab a piece whenever you crave it. Just wrap each slice in plastic wrap, place them in a freezer-safe bag, and they’ll be good for up to 3 months. When you’re ready to enjoy it again, simply thaw it at room temperature or pop it in the toaster for a quick warm-up.
What can I do with leftover brioche?
Leftover milk brioche opens the door to tantalizing culinary possibilities:
- French Toast: Turn your brioche into a deliciously indulgent breakfast classic by soaking slices in a mixture of eggs, milk, and cinnamon.
- Bread Pudding: Use stale brioche as a base for a scrumptious dessert; it’s perfect for soaking up custard.
- Sandwiches: Use it as an elegant alternative for turkey bacon or chicken ham sandwiches.
You can explore more ideas and inspiration at Serious Eats for unique ways to utilize your leftover brioche!
Conclusion on Milk Brioche
Embracing the joy of homemade brioche
Making milk brioche at home isn’t just about baking; it’s an experience that fills your kitchen with warmth and delectable aromas. This soft, pillowy bread can transform any meal into a special occasion, whether you serve it for breakfast or as a base for a scrumptious sandwich with turkey bacon or chicken ham.
Have you ever noticed how a slice of freshly baked brioche makes everything feel a bit more luxurious? With each bite, you’re indulging in a bit of love and care. So, the next time you’re looking to impress or simply treat yourself, remember that the joy of baking your own milk brioche is just a few simple steps away. Don’t forget to check out The Kitchn for additional tips and ideas to elevate your baking journey!
PrintMilk Brioche: The Best Indulgent Recipe for Homemade Delight

A delightful indulgence, this Milk Brioche recipe is perfect for any occasion.
- Prep Time: 30 minutes
- Cook Time: 30 minutes
- Total Time: 2 hours
- Yield: 1 loaf
- Category: Breads
- Method: Baking
- Cuisine: French
- Diet: Vegetarian
Ingredients
- 4 cups all-purpose flour
- 1/4 cup granulated sugar
- 1 teaspoon salt
- 1 packet instant yeast
- 1 cup whole milk
- 3 large eggs
- 1/2 cup unsalted butter, softened
Instructions
- In a large bowl, combine the flour, sugar, salt, and yeast.
- Warm the milk until it is lukewarm, then add to the dry ingredients.
- Add eggs and mix until a dough forms.
- Knead the dough on a floured surface for about 10 minutes.
- Incorporate the softened butter gradually until fully combined.
- Place the dough in a greased bowl, cover, and let it rise for 1-2 hours.
- Shape the dough into a loaf and place it in a greased loaf pan.
- Let it rise again for about 30 minutes.
- Bake in a preheated oven at 350°F for 25-30 minutes.
- Let it cool before slicing.
Notes
- For a richer flavor, use milk that is at room temperature before mixing.
- You can add a bit of vanilla extract for additional flavor.
Nutrition
- Serving Size: 1 slice
- Calories: 200
- Sugar: 5g
- Sodium: 150mg
- Fat: 8g
- Saturated Fat: 5g
- Unsaturated Fat: 3g
- Trans Fat: 0g
- Carbohydrates: 28g
- Fiber: 1g
- Protein: 5g
- Cholesterol: 50mg


")