
Introduction to Peanut Butter Chocolate Lava Cakes
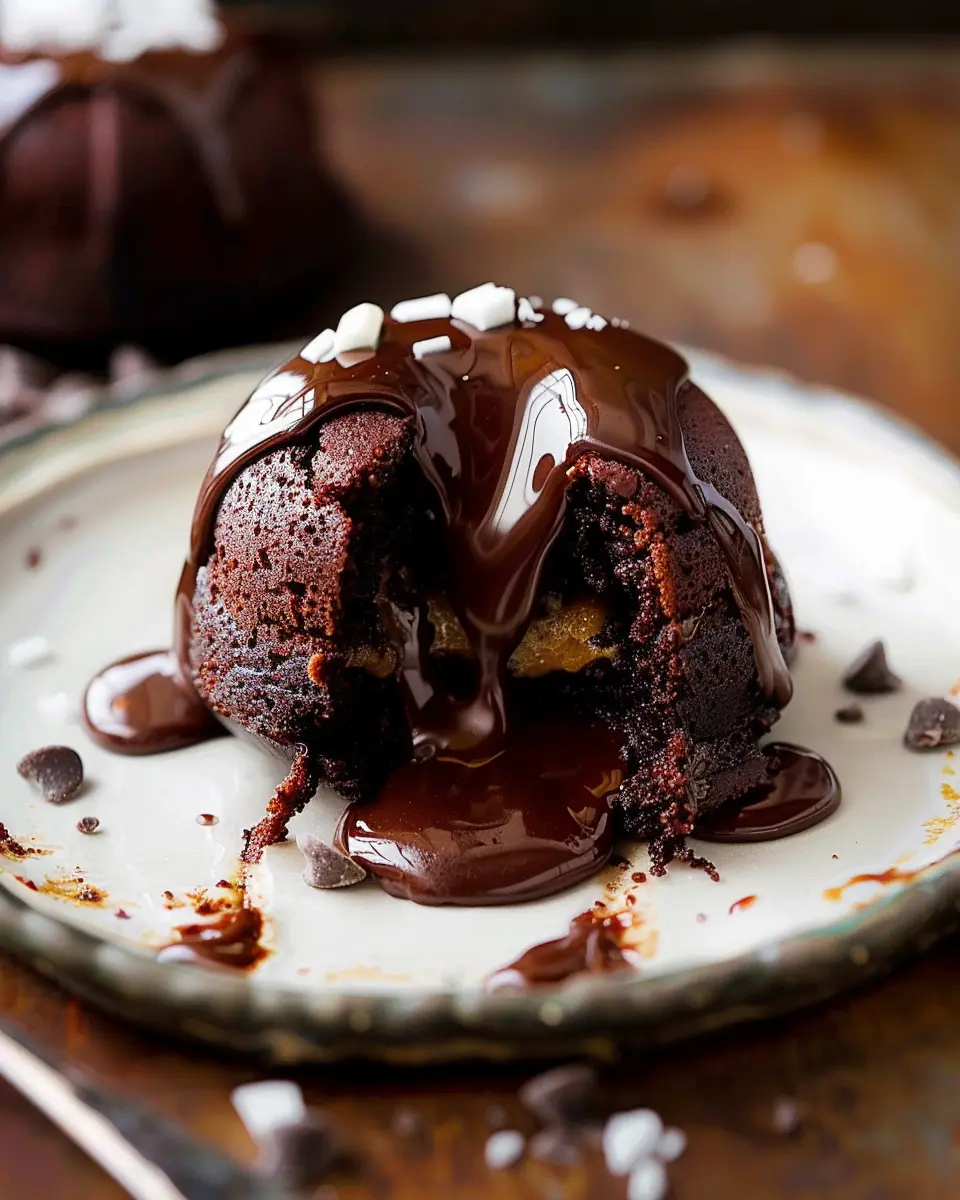
When it comes to desserts that combine rich flavors and gooey textures, peanut butter chocolate lava cakes reign supreme. Imagine a luscious, warm cake that gently gives way to a molten center filled with the intense essence of chocolate and the nutty goodness of peanut butter. This is not just a dessert; it’s an experience, an indulgence that transports you to chocolate heaven with each bite.
What’s the Irresistible Allure of Peanut Butter Chocolate Lava Cakes?
What makes these lava cakes so special? It’s the perfect marriage of flavors. Chocolate and peanut butter have long been culinary partners, with their contrasting yet complementary characteristics creating a timeless appeal. The deep, dark richness of the chocolate contrasts beautifully with the creamy, slightly salty notes of peanut butter, resulting in a flavor combination that’s hard to resist.
-
Textural Delight: The beauty of lava cakes lies not only in their flavor but also in their texture. When you cut into the warm outer layer, the molten filling flows out, creating an irresistible and dramatic presentation. It’s the kind of dessert that impresses friends at dinner parties or provides a cozy treat after a long day.
-
Quick and Easy: The best part? These cakes are surprisingly simple to make at home. With just a handful of ingredients, you can whip up a batch in no time. Perfect for those last-minute cravings or unexpected guests, they offer a gourmet touch without requiring hours of kitchen time. Check out this easy guide for more tips on how to simplify your baking process.
-
Nostalgic Comfort: For many, peanut butter brings back cherished childhood memories. Whether it’s snacking on peanut butter sandwiches or indulging in cookies, including it in desserts evokes a sense of warmth and comfort.
Whether you’re a baking novice or a seasoned pro, making peanut butter chocolate lava cakes will surely be a rewarding endeavor. So roll up your sleeves, gather your ingredients, and get ready to create a dessert that’s more than just a treat—it’s a celebration of flavor and comfort!
Ingredients for Peanut Butter Chocolate Lava Cakes
Essential ingredients for decadent lava cakes
Creating peanut butter chocolate lava cakes is a delightful experience that comes down to picking the right ingredients. You’ll need:
- Bittersweet chocolate: This is the star of the show, giving your cakes that rich, deep flavor. Opt for high-quality chocolate for the best results.
- Unsalted butter: Butter adds moisture and a creamy texture, balancing the sweetness of the chocolate.
- Powdered sugar: Use this for just the right amount of sweetness without the granules interfering with your cake’s smooth texture.
- Eggs: Both whole eggs and egg yolks create a luscious consistency that’s essential for that glorious lava center.
- All-purpose flour: A little flour helps hold everything together without losing that gooey middle.
- Creamy peanut butter: The secret ingredient that adds a nutty richness and depth to your cakes.
Optional toppings for an extra touch
Want to take your peanut butter chocolate lava cakes to the next level? Consider some optional toppings:
- Vanilla ice cream: The cold creaminess pairs beautifully with the warm lava.
- Chopped nuts: Sprinkle some toasted peanuts or almonds for added crunch.
- Chocolate sauce: Drizzle a bit more chocolate on top for those serious chocolate lovers.
- Berries: Fresh raspberries or strawberries can provide a lovely tart contrast to the sweet pastry.
For more tips on enhancing your baking skills, check out resources like King Arthur Baking for expert advice. Enjoy creating your masterpiece!
Step-by-Step Preparation of Peanut Butter Chocolate Lava Cakes
Creating peanut butter chocolate lava cakes is an indulgent way to bring a touch of gourmet flair to your home baking. These little personal-sized desserts boast a rich chocolate exterior with a warm, gooey center that’s sure to impress friends and family. Let’s dive into the step-by-step preparation that will have your kitchen smelling heavenly!
Prepare the ramekins
Before diving into mixing ingredients, you want to ensure that your ramekins are ready to go. This is an essential step to prevent your delicious cakes from sticking.
- Grease the ramekins: Use butter or a non-stick spray to coat the insides of your ramekins thoroughly. This ensures an easy release post-baking.
- Dust with cocoa powder: After greasing, sprinkle a little cocoa powder inside each ramekin. This not only helps prevent sticking but also enhances the chocolate flavor.
Preheat the oven and melt the chocolate
While you’re preparing your ramekins, it’s time to get the oven heated and the chocolate melting.
- Preheat your oven to 425°F (220°C). This high temperature is crucial for creating that sought-after lava effect.
- Melt your chocolate: In a microwave-safe bowl, combine high-quality dark chocolate (preferably 60-70% cocoa) with unsalted butter. Heat in 30-second intervals, stirring in between until fully melted and silky smooth.
Want to know which chocolate to use? Check out this guide on different types of baking chocolate for some great tips!
Mix dry ingredients together
To create a well-balanced batter, combine your dry ingredients before adding any wet elements.
- In a separate bowl, mix together:
- 1 cup of all-purpose flour
- 1 cup of powdered sugar
- A pinch of salt
- Whisk until well combined. This will give your cakes a perfect texture and sweetness.
Combine egg mixtures with chocolate
Now that your chocolate is melted and your dry ingredients are mixed, it’s time to bring everything together.
- In another bowl, whisk together:
- 2 large eggs
- 2 large egg yolks
- Pour this mixture into your melted chocolate while stirring continuously to combine fully. This step is critical for achieving that exquisite molten center.
Pour the batter and add the peanut butter
Now comes the fun part—adding the batter to your ramekins and introducing the star ingredient: peanut butter.
- Divide the mixture evenly among your prepared ramekins, filling each about halfway.
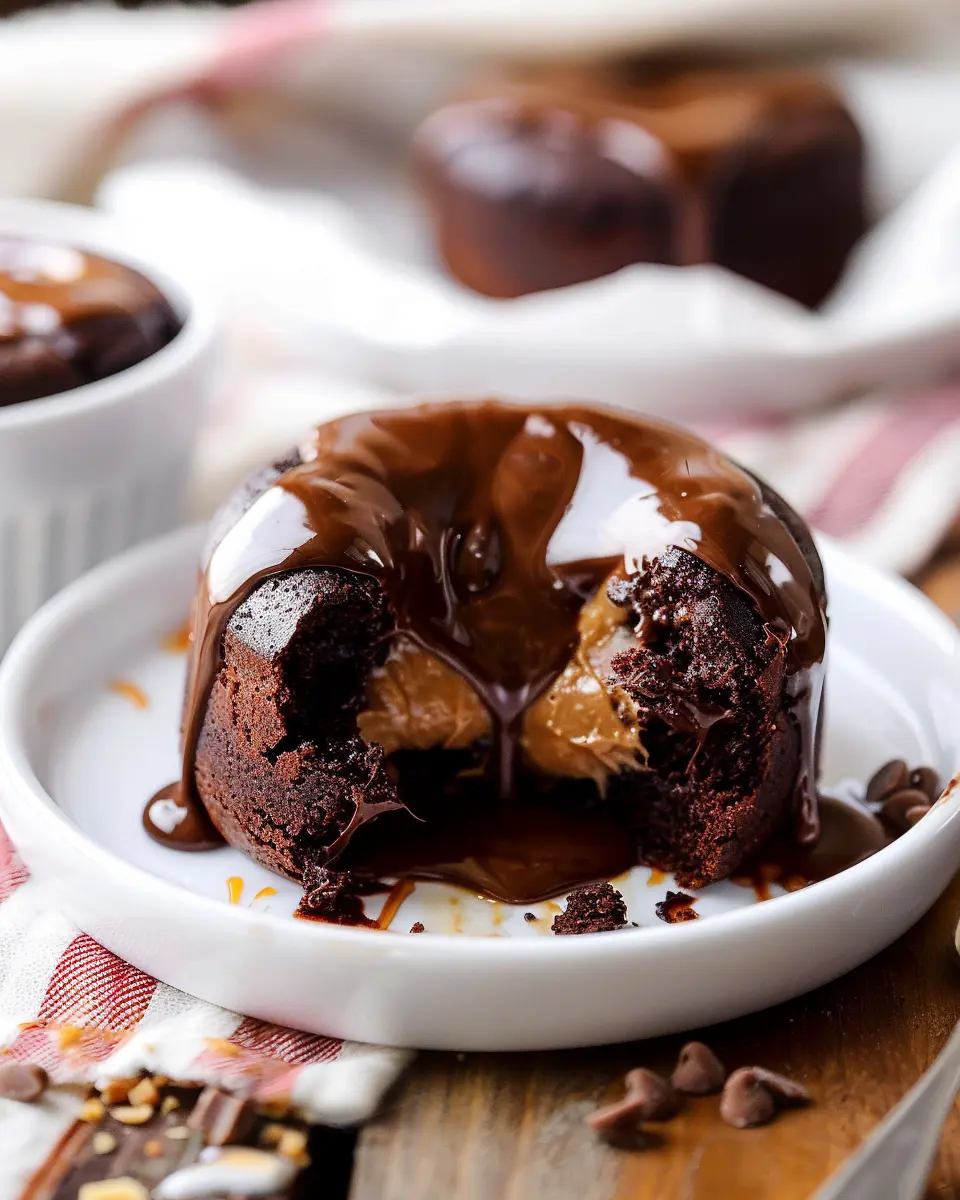
- Add a dollop of peanut butter in the center of each ramekin. Use a small spoon to gently press it down, ensuring it gets enveloped by the chocolate batter. This is what will create the pockets of gooey goodness when they bake!
Bake to perfection
It’s time to pop those ramekins in the oven and let the magic happen.
- Bake for 12-14 minutes, keeping a close eye on them. You want the edges to be firm while the center remains soft and molten. Avoid overbaking, as you want that perfect flow of chocolate lava!
Serve and enjoy the gooey goodness
Once your peanut butter chocolate lava cakes are done, allow them to cool for a minute before serving.
- Carefully invert each ramekin onto a plate and gently lift it off.
- Serve warm, ideally with a scoop of vanilla ice cream or a sprinkle of sea salt to elevate the flavors.
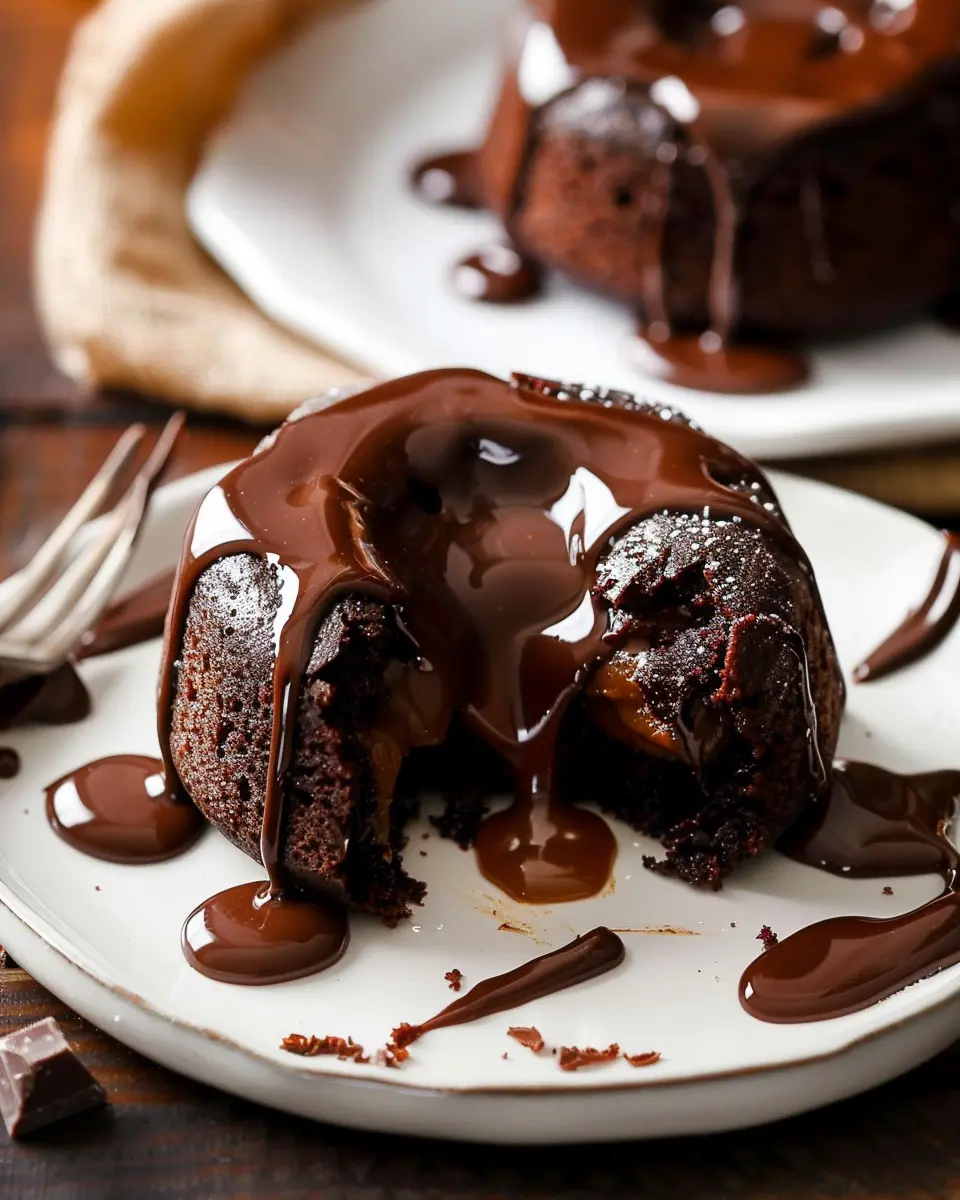
These little cakes are bound to be the star of any gathering, leaving everyone wanting more. Whether it’s a dinner party or a quiet night in, there’s truly nothing better than digging into this warm, chocolatey dream. Enjoy the satisfaction of creating a restaurant-quality dessert right in your own kitchen!

Variations on Peanut Butter Chocolate Lava Cakes
When you’re ready to switch things up from the traditional peanut butter chocolate lava cakes, there are countless delightful variations to explore. Let’s dive into a few options that could make your dessert game even more thrilling!
Classic Lava Cakes without Peanut Butter
Not everyone is a peanut butter fanatic, and that’s perfectly okay! For those classic lava cakes, simply omit the peanut butter. This allows the rich chocolate flavor to truly shine. To enhance the experience, consider adding a hint of espresso or a dash of sea salt, both of which amplify the chocolate and create a sophisticated touch. This recipe remains super easy to follow, making it great for a spontaneous dinner party or a quiet evening with a good book.
Lava Cakes with Different Nut Butters
If you’re looking to give your peanut butter chocolate lava cakes a twist, experiment with different nut butters! Almond butter can impart a delicate sweetness, while cashew butter offers a creamy, mildly nutty flavor. For the adventurous, try sunflower seed butter for a nut-free option that still delivers a warm, molten center. Combining flavors can open new culinary doors, so don’t hesitate to mix and match!
Mini Lava Cakes for Portion Control
For those watching their portion sizes or just wanting to indulge without overdoing it, mini lava cakes are the way to go. These bite-sized treats still deliver that gooey chocolate center but are less guilt-inducing. You can easily bake them in muffin tins for a fun and sharable dessert experience. Serve them hot with a scoop of vanilla ice cream for a sweet finish to any meal!
These variations not only cater to diverse tastes but also keep your dessert repertoire exciting. Want more? Check out Serious Eats for pro tips on perfecting your lava cakes!
Cooking Tips and Notes for Peanut Butter Chocolate Lava Cakes
Common Pitfalls to Avoid in Baking
Baking can be tricky, especially when it comes to achieving that perfect molten center in your peanut butter chocolate lava cakes. Here are a few things to watch out for:
- Overmixing Batter: Gentle mixing helps keep your cakes soft and tender. Too much can cause them to become tough.
- Incorrect Oven Temperature: Always preheat your oven, and consider using an oven thermometer to ensure accuracy.
- Timing Is Key: Underbaking is essential for that gooey center, but just a minute too long can lead to set cakes.
Ingredient Substitutions That Still Work
If you’re missing an ingredient, don’t fret! Here are some easy swaps:
- Swap all-purpose flour for almond flour for a gluten-free version.
- Use coconut oil instead of butter to create a dairy-free treat.
- For a nut-free alternative, you could use sunflower seed butter instead of peanut butter.
How to Store Leftover Lava Cakes
Leftover peanut butter chocolate lava cakes can be stored covered in the refrigerator for up to three days. To reheat, pop them in the microwave for about 15-20 seconds, then enjoy the gooey goodness again! If you want to freeze them, wrap each cake tightly in plastic wrap and store in an airtight container for up to a month. Just remember to let them thaw before reheating.
By following these tips, you’ll be on your way to impressing your friends and family with decadent peanut butter chocolate lava cakes! For more baking advice, check out King Arthur Baking and Serious Eats for expert opinions.
Serving Suggestions for Peanut Butter Chocolate Lava Cakes
Creative Accompaniments that Enhance Flavors
When it comes to peanut butter chocolate lava cakes, the right accompaniment can elevate your dessert to a new level. Consider these delicious additions:
- Fresh Berries: Strawberries or raspberries add a zesty contrast to the rich chocolate and peanut butter, enhancing both taste and presentation.
- Whipped Cream: A dollop of lightly sweetened whipped cream balances the richness of the cake. You might even try adding a hint of vanilla or cinnamon for extra flair.
- Nut Butter Drizzle: A drizzle of creamy or crunchy peanut butter (melted lightly for a smooth application) on top can intensify those nutty flavors, making each bite heavenly.
Presentation Tips for a Stunning Dessert
Visual appeal can make or break your dessert presentation. Here are some tips to wow your guests:
- Plating: Serve your peanut butter chocolate lava cakes on small, elegant plates. Dust with powdered sugar and arrange the fresh berries artistically around the cake.
- Garnishes: A sprig of mint or a sprinkle of sea salt can add a sophisticated touch. For an extra layer of indulgence, don’t shy away from a scoop of vanilla ice cream alongside the cake.
- Serving Temperature: Serve your cakes warm for that gooey chocolate center; it’s an unforgettable experience.
Ultimately, it’s all about balancing flavors and ensuring your dessert looks as delightful as it tastes. For more tips on dessert pairings, check out this guide. Enjoy!
Time Breakdown for Peanut Butter Chocolate Lava Cakes
When you’re craving a delectable dessert, knowing how much time your peanut butter chocolate lava cakes will take can make all the difference. Here’s a quick overview to help you plan your baking journey!
Preparation Time
Get your game face on for about 15 minutes in the kitchen! This includes gathering ingredients, mixing the batter, and prepping your ramekins. It’s the fun part where the sweet aroma of chocolate fills the air, making it all worth it.
Baking Time
Once your cakes are prepped, pop them in the oven for about 10-12 minutes. That’s just enough time to let the magic happen—creating that perfect gooey center we all crave.
Total Time
In a nutshell, you’re looking at around 25-30 minutes from start to finish. So, whether you’re whipping these up for a dinner party or a cozy night in, you’ll have a delightful dessert ready in no time.
For detailed guidance and tips for crafting the best lava cakes, check out this helpful guide from Cooking Light and get inspired to create your masterpiece!
Nutritional Facts for Peanut Butter Chocolate Lava Cakes
When indulging in peanut butter chocolate lava cakes, it’s important to know what you’re savoring! Each delightful serving contains approximately 300 calories, making it a rich treat for special occasions.
Carbohydrates and Protein Content
These cakes are a great balance, offering around 30 grams of carbohydrates and 7 grams of protein. The combination of ingredients not only satisfies a sweet tooth but also provides some protein, courtesy of the peanut butter.
Dietary Considerations
If you’re mindful of dietary restrictions, you’re in luck! These peanut butter chocolate lava cakes can be made gluten-free by swapping all-purpose flour for a gluten-free blend. Moreover, with the right sweeteners, you can adapt this recipe for lower-sugar diets. Feel free to explore more about dietary modifications from Healthline or The Kitchn.
So, whether you’re treating yourself or sharing with friends, being informed about the nutritional aspect makes your dessert experience even sweeter. Enjoy containing the rich flavors and textures while staying aware of your choices!
FAQs about Peanut Butter Chocolate Lava Cakes
How can I ensure my lava cakes are gooey in the center?
Getting that perfect gooey center in your peanut butter chocolate lava cakes comes down to timing. Bake them for about 10-12 minutes. You want the edges to be set but the middle slightly jiggly. A good tip is to use ramekins with a dark finish, as they bake more evenly and facilitate that ideal lava effect. Keep an eye on them during the last few minutes—practice makes perfect!
Can these lava cakes be made ahead of time?
Absolutely! You can prepare the batter and pour it into ramekins a day ahead. Just cover them with plastic wrap and refrigerate. When you’re ready to indulge, simply pop them in the oven. Note that you may need to increase the baking time by a couple of minutes if they’re coming straight from the fridge. This is a great way to impress guests without the last-minute rush!
What are the best practices for storing lava cakes?
If you happen to have leftovers (though I doubt you will!), the best way to store your peanut butter chocolate lava cakes is to let them cool completely. Then transfer them to an airtight container. They can be stored in the refrigerator for about 2-3 days. When you want to enjoy them again, you can warm them gently in the microwave for about 20 seconds—just be careful not to overdo it, or you might lose that ooey-gooey center!
For a deeper dive into lava cake tips and tricks, check out this chocolate baking guide for more insights! Whether you’re baking for a date night or a cozy gathering, these peanut butter chocolate lava cakes are sure to steal the show.
Conclusion on Peanut Butter Chocolate Lava Cakes
Why You Should Try Making This Dessert at Home
When it comes to impressing friends or treating yourself, there’s nothing quite like peanut butter chocolate lava cakes. The gooey center and rich flavors create the ultimate dessert experience right from the comfort of your kitchen. Not only is this treat fun and decadent, but it also showcases your culinary skills effortlessly!
Plus, the ingredients are simple, allowing you to whip up a gourmet dessert anytime. Imagine a warm cake bursting with chocolate and peanut butter goodness—who can resist? According to the Fine Cooking, this delightful duo always hits the mark. So grab your ingredients, and let’s make some magic happen!
PrintPeanut Butter Chocolate Lava Cakes: Indulgent Bliss for All
Indulge in the rich, gooey goodness of peanut butter chocolate lava cakes. Perfect for any chocolate lover!
- Prep Time: 15 minutes
- Cook Time: 14 minutes
- Total Time: 29 minutes
- Yield: 4 servings
- Category: Dessert
- Method: Baking
- Cuisine: American
- Diet: Vegetarian
Ingredients
- 1 cup creamy peanut butter
- 1 cup dark chocolate chips
- 4 large eggs
- 1 cup granulated sugar
- 1/2 cup all-purpose flour
- 1/4 cup unsalted butter, melted
- 1 teaspoon vanilla extract
- 1/4 teaspoon salt
Instructions
- Preheat the oven to 350°F (175°C).
- In a bowl, mix peanut butter and chocolate chips until smooth.
- In another bowl, whisk eggs and sugar until light and fluffy.
- Combine peanut butter mixture with egg mixture.
- Gently fold in flour, melted butter, vanilla, and salt.
- Pour the batter into greased ramekins.
- Bake for 12-14 minutes until the edges are set but the center is still soft.
- Let cool for a minute, then invert onto plates and serve immediately.
Notes
- Serve with a scoop of vanilla ice cream for extra indulgence.
Nutrition
- Serving Size: 1 cake
- Calories: 400
- Sugar: 30g
- Sodium: 200mg
- Fat: 24g
- Saturated Fat: 10g
- Unsaturated Fat: 14g
- Trans Fat: 0g
- Carbohydrates: 36g
- Fiber: 2g
- Protein: 8g
- Cholesterol: 150mg
")