
Introduction to Yeast Bread
Why Homemade Yeast Bread?
Have you ever wondered why there’s something so cozy about the smell of freshly baked bread wafting through your home? Homemade yeast bread is not just about nourishment; it’s an experience that taps into the very essence of cooking. When you choose to make bread yourself, you’re not just preparing a meal; you’re engaging in a science while creating something remarkably personal. According to the Bread Lab at Washington State University, the texture and flavor of freshly baked bread made from scratch is unparalleled.
Going homemade also allows you to control the ingredients—goodbye preservatives, hello fresh flour! You can tweak recipes with your favorite herbs, seeds, or even a splash of olive oil to make it distinctly yours. So, if you’ve ever asked yourself, “Why should I bother making my own bread?” consider this: the rewards of flavor, nutrition, and satisfaction make it well worth the effort.
The Joy of Baking Your Own Bread
Imagine waking up on a lazy Sunday, rolling out of bed, and preparing to bake your first loaf of yeast bread. What you may not realize is that baking bread is more than a culinary task; it’s a creative outlet that can transform your day. Kneading dough can be surprisingly therapeutic; it’s like a mini workout wrapped in a delicious aroma. Plus, there’s something incredibly satisfying about watching dough rise and transform into a beautiful loaf.
Think about the last time you shared homemade bread with friends or family. The smiles and compliments that followed are priceless. It’s a gesture of love that goes beyond mere sustenance—something you constructed with your own hands. If you’re curious about the science behind yeast, check out this insightful article from the American Society of Brewing Chemists.
As we dive into “The World’s Easiest Yeast Bread” recipe, let’s embrace the joy and satisfaction that comes from creating something simple yet extraordinary. Trust me, your future self will thank you every time you savor the first warm slice smothered in butter. Ready to give it a try? Let’s get started!
Ingredients for Yeast Bread
Essential ingredients for a great loaf
To craft a delicious yeast bread, you’ll need some staple ingredients:
- Flour: The backbone of your loaf.
- Water: Activates the yeast.
- Yeast: The magic ingredient that makes your bread rise.
- Salt: Enhances flavor and strengthens dough.
- Sugar: Feeds the yeast and promotes browning.
These ingredients work together harmoniously, creating a structure that gives your bread its delightful texture and taste.
Flour varieties and their impact
Choosing the right flour can influence your yeast bread’s outcome significantly. All-purpose flour is versatile and convenient, while bread flour, with its higher protein content, yields a chewier, airier texture. Whole wheat flour offers a nutty flavor and additional nutrients. If you want to dive deeper into the different types of flour, check out resources from the King Arthur Baking Company for detailed insights.
The role of yeast in bread-making
Yeast is crucial in the fermentation process. It consumes the sugars and, in turn, produces carbon dioxide and alcohol, which makes the dough rise and adds flavor. Without it, you would end up with a dense, flat loaf. When choosing yeast, you can use active dry yeast or instant yeast, both of which are effective for making delicious yeast bread. Just remember, a little yeast can go a long way!
Preparing Yeast Bread
Baking yeast bread at home can be one of the most rewarding experiences in your culinary journey. Nothing quite compares to the aroma of fresh bread wafting through your kitchen, signaling that a delicious homemade loaf is on the way. Let’s walk through the simple steps of preparing this delightful treat together, so you can impress friends and family (and maybe even yourself!) with freshly baked goodness.
Combining Dry Ingredients
To begin your journey toward a glorious loaf of yeast bread, you’ll want to start by gathering your dry ingredients. This typically includes all-purpose flour, salt, and sugar.
- Flour: The backbone of your bread, providing structure, is best when using all-purpose flour. For added flavor and nutrition, consider incorporating whole wheat flour.
- Salt: Essential not just for flavor but also for controlling yeast activity. Too much salt can inhibit the yeast, so stick to the recommended amount.
- Sugar: It acts as food for the yeast, helping it rise. If you’re conscious about sugar, you can experiment with substitutes or decrease the amount slightly.
Mix these ingredients well in a large bowl, and you might find it handy to whisk them together—a quick whisking can help to aerate the flour and distribute the salt and sugar evenly.
Adding Warm Water and Mixing
Next, it’s time to introduce warmth to your dry mixture in the form of warm water. This is a crucial step as yeast bread relies heavily on the activation of the yeast through the right temperature.
- Temperature Check: Aim for water around 100°F to 110°F (think slightly warmer than a warm bath) to ensure the yeast wakes up without getting killed by heat.
- Mix Together: Once you add the warm water, mix everything until a rough dough forms. Don’t be alarmed; it should be a bit sticky. This is a sign that you’re on the right track!
For tips on water temperature, you might want to check out resources from the King Arthur Baking Company.
The Art of Letting It Rise
Here comes the magical part! You will need to let your dough rise. This is often called “proofing,” and it allows the yeast to work its magic!
- Cover and Store: Transfer your dough to a greased bowl and cover it with a clean kitchen towel or plastic wrap to retain warmth and moisture.
- Rising Time: Let it sit in a warm, draft-free space for about an hour, or until it has doubled in size. If you find your kitchen on the cooler side, consider placing it in the oven (turned off) with just the light on to create a cozy environment.
This step is crucial; without allowing the yeast to rise, you might end up with bread that’s dense instead of light and fluffy.
Shaping the Dough
Once your dough has risen, the next step is to shape it. This is where your creativity can shine through!
- Deflating Gently: Punch down the dough slightly to release the air pockets that have built up.
- Forming the Loaf: Shape it into a loaf or individual rolls, depending on your preference. If you’re feeling adventurous, you might even try braiding the dough for a more festive look.
Don’t worry if your shape isn’t perfect; the most important thing is that it’s delightful and homemade!
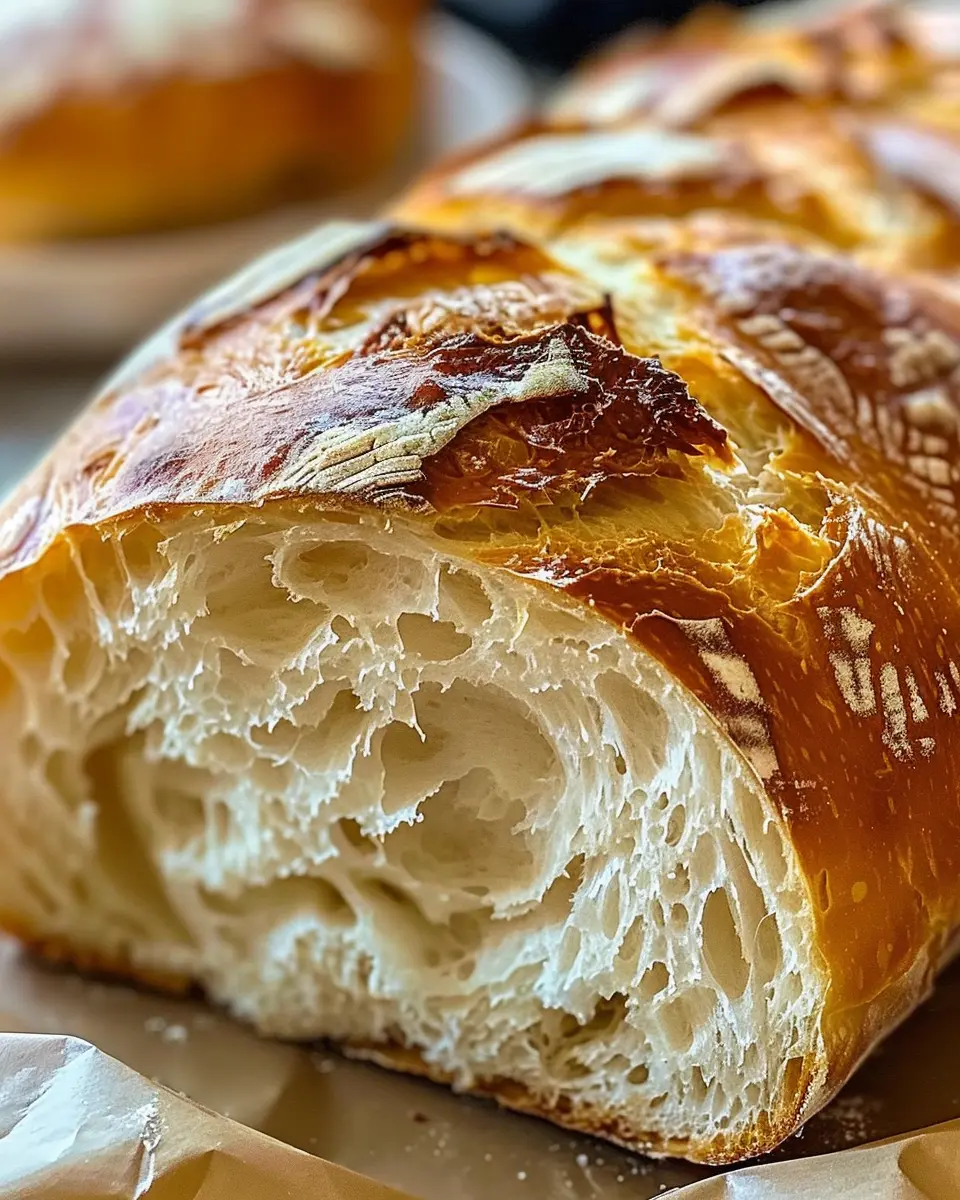
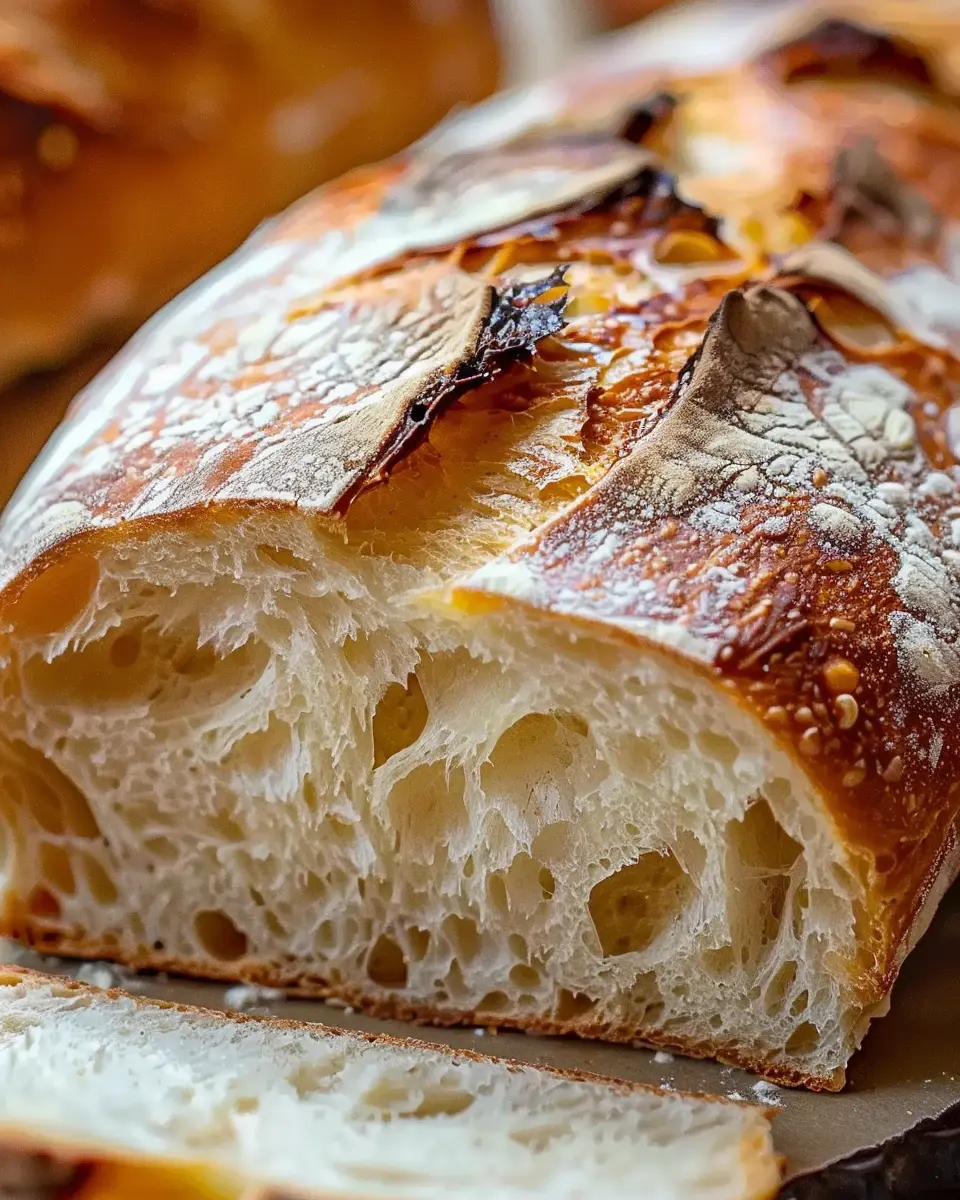
Baking to Perfection
Now we arrive at the ultimate test of your yeast bread skills: baking!
- Preheat Your Oven: Set it to the appropriate temperature — typically around 375°F for standard recipes.
- Bake Time: Depending on the size and shape of your loaf, bake for 25 to 30 minutes or until the crust is golden brown.
To test for doneness, gently thump the bottom of the loaf; a hollow sound means it’s ready to enjoy.
As you bake this bread, enjoy the sweet smell, and get ready for the delicious moment when you can slice into it. Freshly baked yeast bread is immensely satisfying and absolutely worth the effort!
With a little practice, you’ll nail this basic technique, and who knows—before long, you might be customizing your own flavors, adding herbs, or even topping with your favorite spreads. Happy baking!
Variations on Yeast Bread
The beauty of yeast bread is its incredible versatility! Whether you’re looking to elevate your meal or simply use what you have on hand, consider these delightful variations.
Herb-infused yeast bread
Imagine walking into your kitchen, greeted by the warm and inviting aroma of a loaf infused with fresh herbs. This variation is simple yet brings a gourmet touch to your table. You can add herbs like rosemary, thyme, or basil right into the dough.
- Mix 2 tablespoons of finely chopped fresh herbs into your dry ingredients before adding water.
- For an extra burst of flavor, brush the top of your loaf with olive oil and sprinkle more herbs before baking.
A perfect pairing for soups and salads, this yeast bread variation is sure to please!
Cheese-stuffed yeast bread
Who can resist the gooey goodness of melted cheese? Cheese-stuffed yeast bread is a fantastic way to indulge.
- Before shaping your loaf, flatten the dough and layer it with shredded cheese—think mozzarella or cheddar.
- Roll it up tightly and seal the edges, then bake as usual for a delicious surprise.
This bread is ideal for gatherings or a cozy night in with a bowl of marinara for dipping.
Whole grain yeast bread
Looking to add some wholesome goodness to your yeast bread? Whole grain versions offer rich flavor and health benefits, packed with fiber and nutrients.
- Substitute half of the all-purpose flour with whole wheat flour for a hearty texture.
- You might consider adding seeds like flaxseeds or sunflower seeds for crunch.
For guidance, check out resources from the Whole Grains Council to fully explore the benefits and options available.
Each of these variations transforms your basic yeast bread into something extraordinary while keeping the simplicity that makes it a favorite in the kitchen! Happy baking!
Cooking Tips and Notes for Yeast Bread
Tips for Achieving the Perfect Crust
Achieving that beautiful crust on your yeast bread is all about moisture and temperature. Try placing a pan of hot water in the oven while baking; the steam it creates helps to develop a crisp outer layer. Additionally, consider using a baking stone, as it can evenly distribute heat and enhance crust formation.
Common Mistakes to Avoid
One of the most common pitfalls in making yeast bread is not allowing your dough to rise adequately. Patience is key! Ensure your dough has doubled in size before baking. Also, be mindful of your water temperature; too hot can kill the yeast, while too cold can hinder its activation. For tips on yeast activation, you can check out this extensive guide.
Enhancing Flavor with Resting Time
Resting your dough not only improves its texture but also intensifies the flavor. Letting it sit for at least an hour after mixing allows the yeast to work its magic, developing rich, complex notes that make every slice irresistible. A longer resting time, even up to overnight in the refrigerator, can elevate your yeast bread further.
With these tips, you’ll be on your way to creating a loaf that’s not just easy but also delectable. Happy baking!

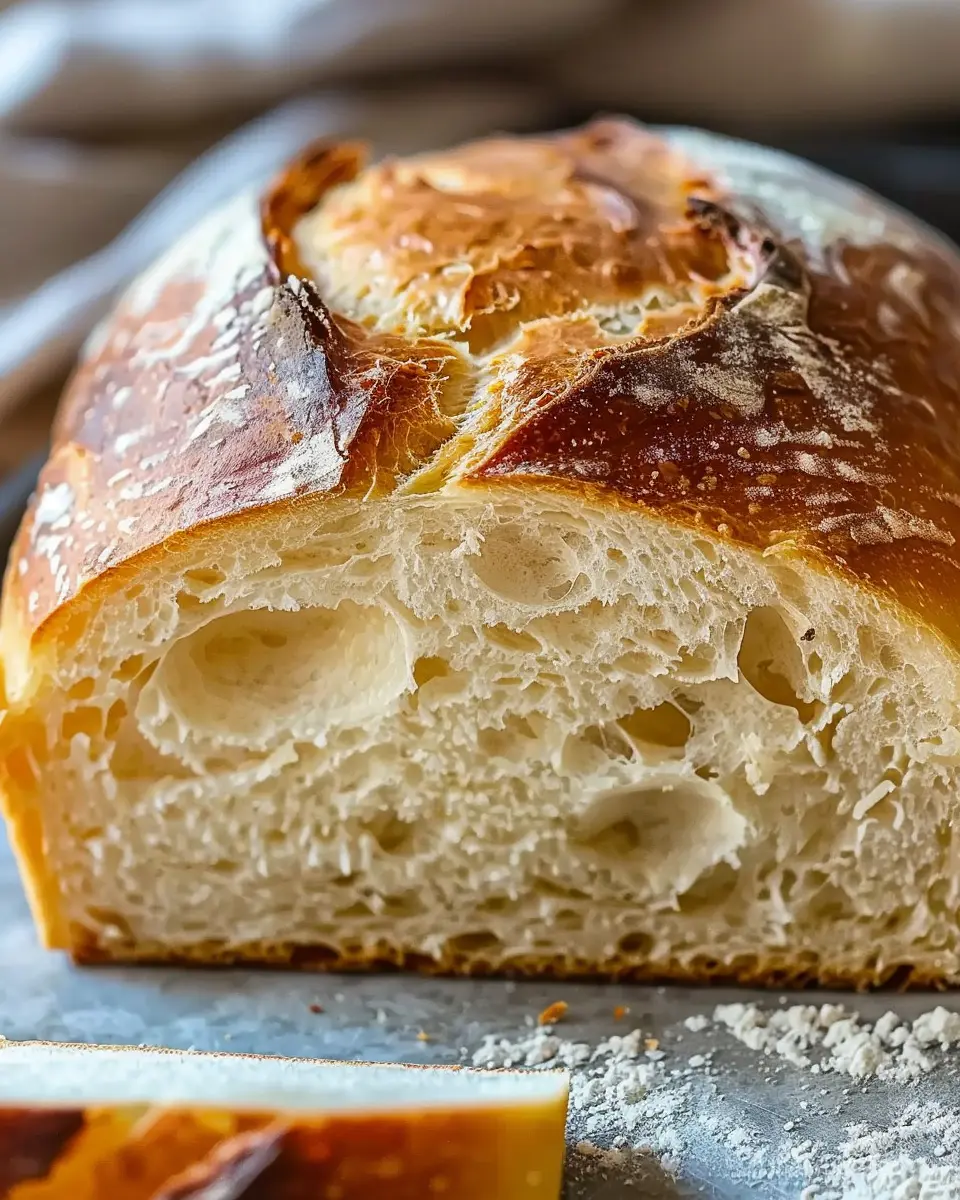
Yeast Bread Made Easy: The World’s Easiest Yeast Bread Recipe
The World’s Easiest Yeast Bread is a simple and foolproof recipe that anyone can make at home.
- Prep Time: 10 minutes
- Cook Time: 35 minutes
- Total Time: 2 hours 45 minutes
- Yield: 1 loaf
- Category: Bread
- Method: Baking
- Cuisine: American
- Diet: Vegetarian
Ingredients
- 4 cups all-purpose flour
- 2 teaspoons salt
- 2 tablespoons sugar
- 2 teaspoons instant yeast
- 1 and ½ cups warm water
Instructions
- In a large bowl, combine flour, salt, sugar, and instant yeast.
- Add warm water and mix until a wet dough forms.
- Cover the bowl with plastic wrap and let it rise for 2 hours.
- After 2 hours, preheat your oven to 450°F (230°C).
- Shape the dough into a loaf and place it in a greased loaf pan.
- Bake for 30-35 minutes or until golden brown.
Notes
- For best results, let the dough rise in a warm place.
- This bread is best served fresh, but it can be stored in an airtight container.
Nutrition
- Serving Size: 1 slice
- Calories: 120
- Sugar: 1g
- Sodium: 200mg
- Fat: 1g
- Saturated Fat: 0g
- Unsaturated Fat: 0.5g
- Trans Fat: 0g
- Carbohydrates: 24g
- Fiber: 1g
- Protein: 4g
- Cholesterol: 0mg


")